
Updated on Mar. 05, 2025
Position: Resource - Data Recovery - How to Recover Photos Deleted from Recycle Bin? (FREE)
In our daily use of computers, we may accidentally delete photos, files, or other important data from hard drives. And many of us may feel terrified after emptying the Recycle Bin, because those files seem to get lost for good. However, the fact is that deleted photos are not completely disappearing from computer hard drives totally even after the Recycle Bin is emptied. This article will detail five commonly used methods to help you get back deleted photos.
Before diving into photo recovery methods, let's first have a look at how file deletion works on your computer. When you delete a file or photo on your computer, it is not immediately erased from the hard drive. Instead, it is moved to the Recycle Bin (on Windows) or Trash (on Mac). At this point, the file's content is still stored the hard drive, but its index information in the file system (e.g. MFT or FAT) is marked as "deleted", which makes the operating system finds no where to locate the deleted file.
Moreover, even when you empty the Recycle Bin or delete the file via the Shift and Delete keys, the operating system does not actually wipe the file content. In fact, it releases the storage space, allowing the system to write new data in the future. Therefore, for a period after emptying the Recycle Bin, as long as no new data overwrites that space, those lost photos are recoverable. So, this is why, even after emptying the Recycle Bin, there is still a chance to retrieve lost photos using specialized tools.
If deleted photos are still in the Recycle Bin and haven't been further deleted, the recovery will be quite straightforward. Please note that if the Recycle Bin or Trash has already been emptied, this method won't work. To recover deleted files from Recycle Bin:
For Windows users: First, open the "Recycle Bin" by double-clicking it on the desktop. Next, find the photos you want to recover, right-click then, and select "Restore". These photos will be restored back to their original folder.
For Mac users: First, open "Finder", and click "Trash" in the left panel. Next, find the photos you want to recover, right-click, and select "Put Back". Then these photos will be restored to their original location.
Windows provides a simple file recovery tool that can help users quickly search for lost files or photos. However, this method works for recently deleted photos but does not support cases where the data has been completely overwritten.
Step 1. Open "This PC" and locate the hard drive or partition where the photos were stored (e.g., C: drive).
Step 2. In the address bar, type "search-ms://overturn: drive letter", for example, search-ms://overturn:C: (replace C with the actual drive letter).
Step 3. In the search results, select "View all files".
Step 4. Filter by "All files" and locate the photos you want to recover.
Step 5. Right-click the desired photos and select "Restore".
If you'd enabled the automatic backup feature for your computer or mobile phone, your photos and videos might have been uploaded to a cloud storage service such as Google Drive. To restore them, you need to log in your cloud storage account, find your backups, and download them back to your local disk.
If the above methods fail, don't panic, you still have a chance to recover lost photos by using free data recovery software.
CuteRecovery Free is a free and powerful data recovery program that supports recovering deleted and lost photos, videos, documents, and audio files from various storage drives.
Note: Avoid saving recovered files to the same hard drive to prevent overwriting the original data.
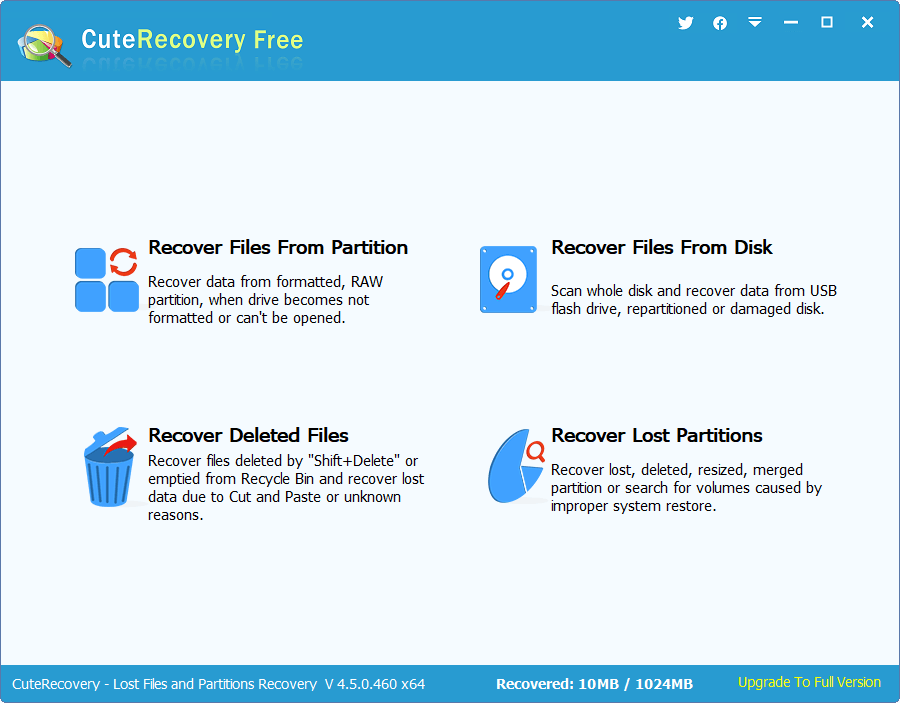
Step 1: Download, install, and run CuteRecovery Free. On the main interface, select "Recover Deleted Files".
If your photos were lost due to other reasons, choose the appropriate recovery mode based on the situation.
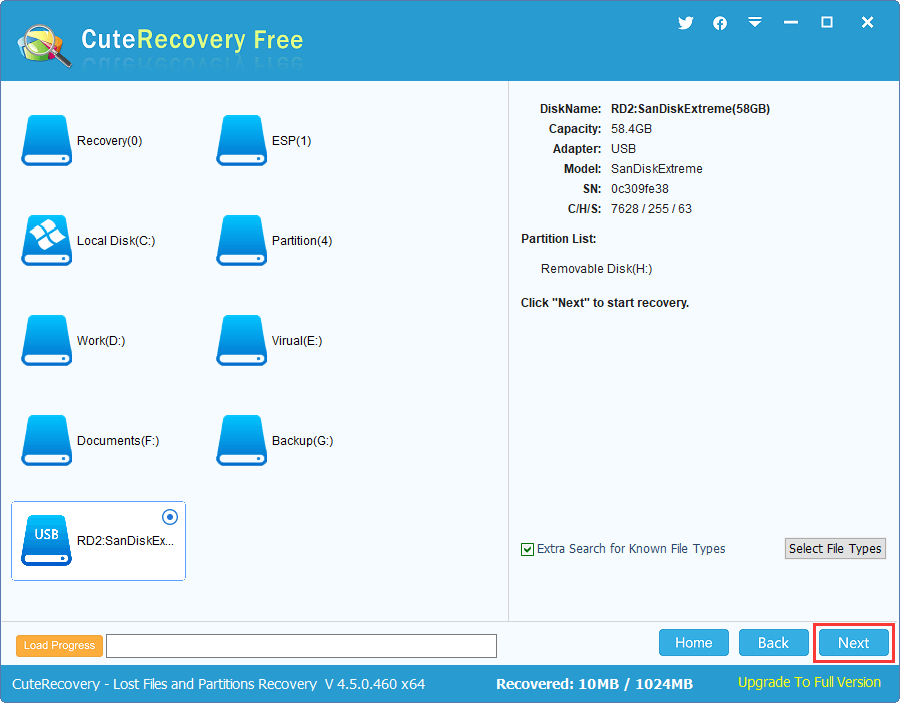
Step 2: Select the drive where the lost photos were stored (the location where the photos were originally saved), then click "Next" to let the software start searching for lost data.
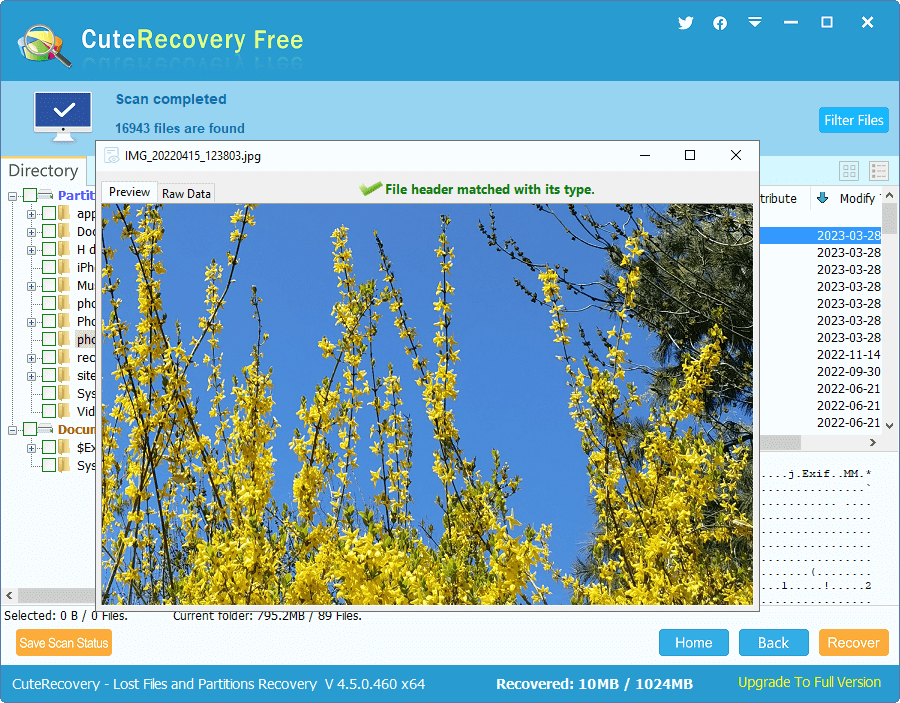
Step 3: Preview the files listed in the scan results to confirm if they are correct.
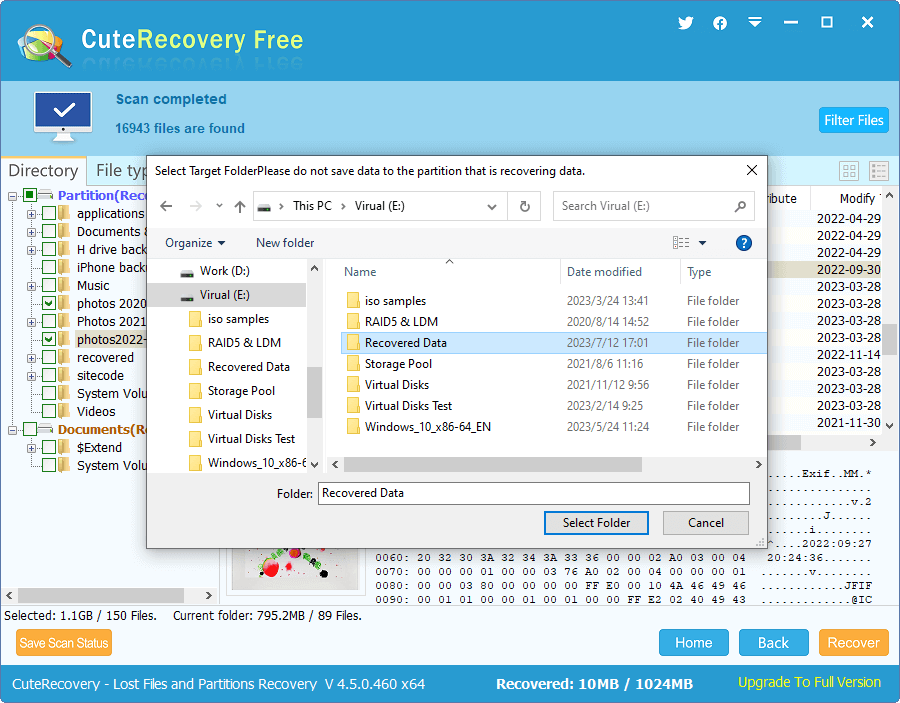
Step 4: Select photos you want to recover, then click the "Recover" button in the lower right corner. Next, choose a path that does not overlap with the original photo storage location. Once the photos are successfully exported, the photo recovery task is complete.
If none of the above methods work and the lost photos contain extremely important data, you should consider seeking help from professional data recovery companies. These companies have specialized equipment and expertise to extract almost any type of data from hard drives. However, such services are usually costly.
During the photo recovery process, there are some critical points to keep in mind to improve the success rate of deleted photo recovery.
Stop storing new data: When you find that important photos get deleted, please stop storing any new data on the device. After a file is deleted, the disk space on the hard drive is marked as being available for storing new data. Writing new data at this point is likely to overwrite deleted photos, making the photo recovery task impossible. For example, if you accidentally delete photos from the Recycle Bin, avoid installing software or saving files on the same device.
Act quickly: As mentioned earlier, deleted files can be recovered as long as they are not overwritten. However, the longer you wait, the higher the risk of overwriting lost data, which reduces the chances of successful recovery.
Use reliable data recovery software: When using data recovery tools, always opt for reputable and reliable software. It'll be perfect if free recovery software can solve the problem. What's more, you should avoid downloading programs from untrusted websites, as they may contain malware or viruses that could cause further damage to your device or data.

DiskGenius is a one-stop solution to recover lost data, manage partitions, and back up data in Windows.
Download DiskGenius
 DiskGenius Free
 DiskGenius Standard
 DiskGenius Professional
 Edition Comparison


 Facebook
 YouTube
 Twitter