
Updated on May. 28, 2024
Position: Resource - Data Recovery - Data Recovery with DiskGenius (Detailed Steps)
DiskGenius is powerful data recovery software with user-friendly interface and efficient data recovery features. No matter whether you are an ordinary user or a professional technician, you can easily use DiskGenius to recover lost data. Here are the simple steps to recover data using DiskGenius:
1. Download and install DiskGenius: First, download and install the DiskGenius software from the official website. Once the installation is complete, you can launch the program.
2. Select the target drive: In the DiskGenius interface, your hard disk and partition information will be listed. Select the target drive from which you need to recover data. This can be a hard disk partition, USB flash drive, SD card, and other storage device.
3. Select a data recovery mode: DiskGenius offers various data recovery modes, including file recovery, lost partition recovery, RAW drive recovery, RAID data recovery, and more. Select the appropriate recovery mode based on the cause of your data loss.
4. Scan for lost data: DiskGenius will scan the selected drive for lost data. The scan may take some time, depending on the size and speed of the drive.
5. Preview and recover data: After the scanning is finished, DiskGenius will list the lost files. You can preview these files to check if they are the ones you want to recover. Then, choose a new location to save the recovered files, it is best not to save them on the original disk to avoid overwriting the original data.
6. Complete the recovery: Once you have confirmed that you have selected the files to be recovered and saved them to the target location, the recovery process is complete. You can close DiskGenius and access your recovered data.
Below are the specific steps and screenshots for File Recovery and Partition Recovery:
Step 1: Select the disk or partition from which you want to recover data in the main interface of DiskGenius, and then click the File Recovery icon in the upper toolbar.
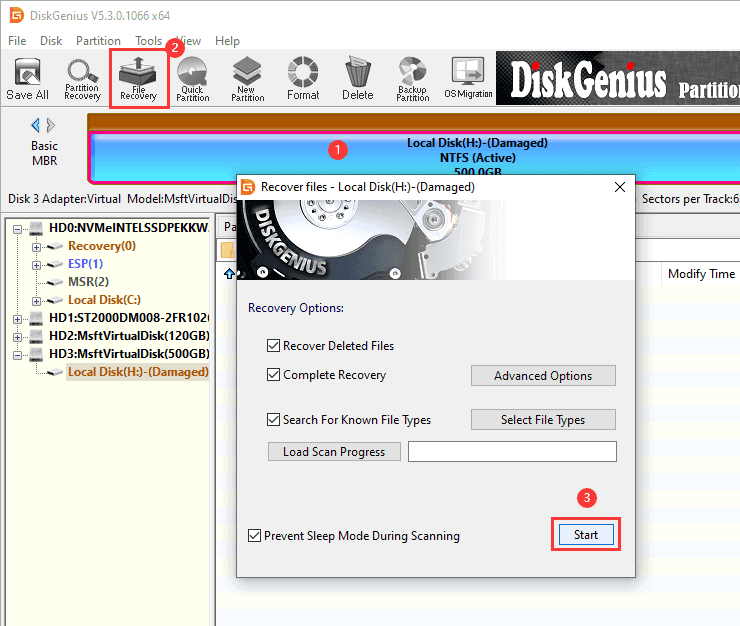
Step 2: Click Start in the pop-up window and the software will start scanning.
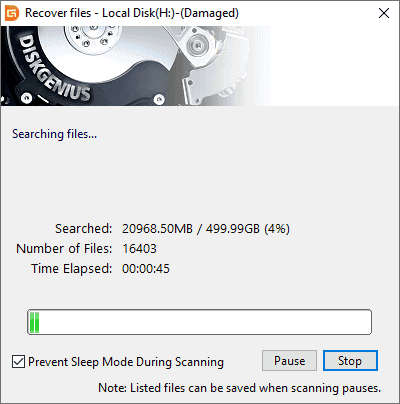
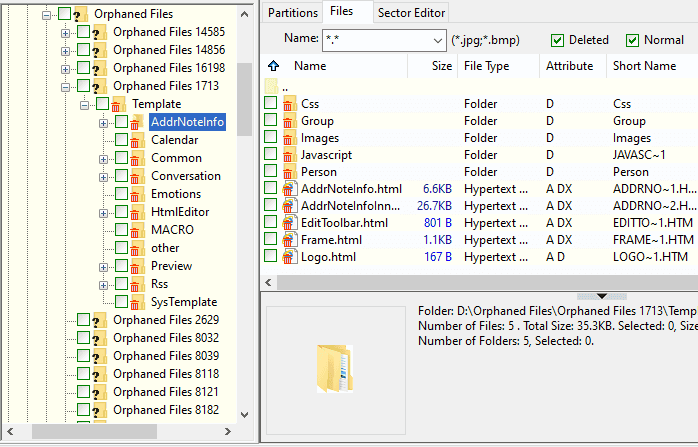
When the scanning process is complete, the Recover Files window will close automatically. The main interface of the software will display all the found files and folders, each with a checkbox in front. Checkboxes are also added to the entries in the folder hierarchy chart on the left side, allowing you to select files easily and quickly.
For files and folders whose ownership is uncertain, the program places them in a folder called "Orphaned Files." If you cannot find the files you want to recover in their original locations, try looking for them in the "Orphaned Files" folders. Don't forget to check these folders after the scanning is completed, as it is very likely that the important files you want to recover are here.
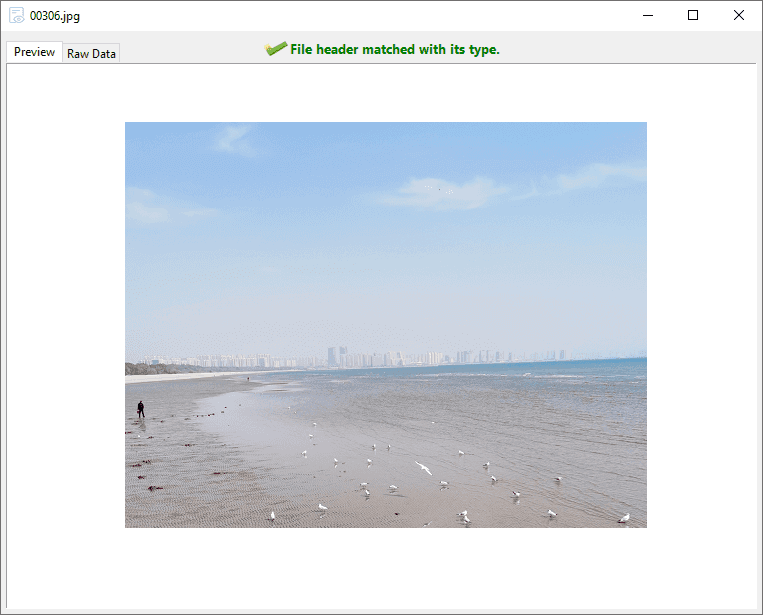
Step 3: Preview the files. If a file can be previewed correctly in the software, it means the file is not corrupted. The preview result is the the recovery result.
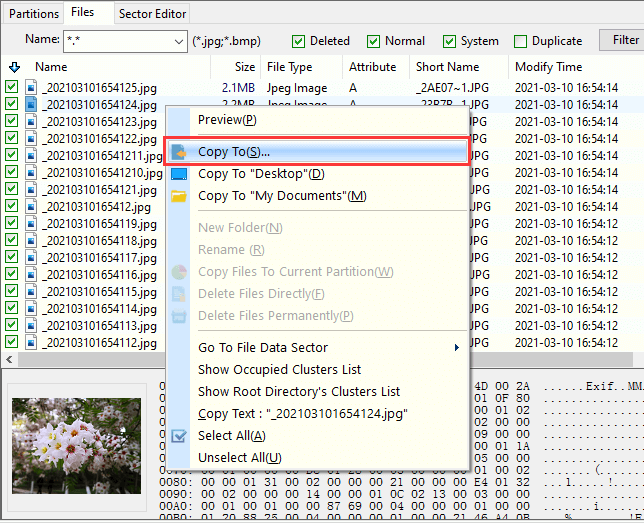
Step 4: Tick the checkboxes in front of the files you need to recover, then right-click to copy them.
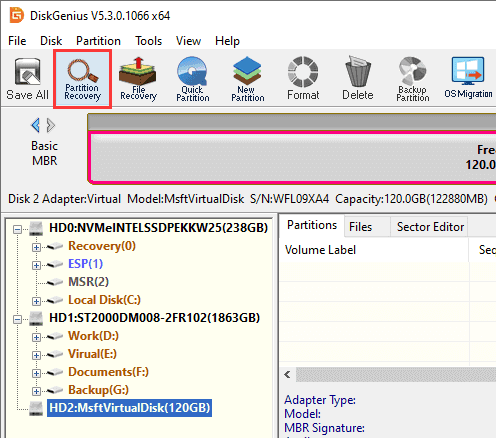
Step 1: Select the hard drive that needs to recover deleted or lost partitions in the software interface, and then click the "Partition Recovery" icon in the toolbar.
Step 2: The software will display the "Search for Lost Partitions" window. After setting the search options, click the Start button.
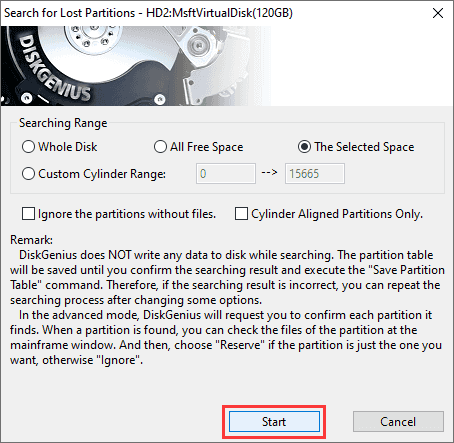
There are three types of searching ranges:
Whole Disk: ignores existing partitions and searches the entire disk from beginning to end.
All Free Space: keeps the existing partitions and searches for lost partitions in all free space.
The Selected Space: keeps the existing partitions and searches for partitions only in the currently selected free area.
After searching for a partition, the software will immediately display the found partition in the interface and pop up the following prompt message:
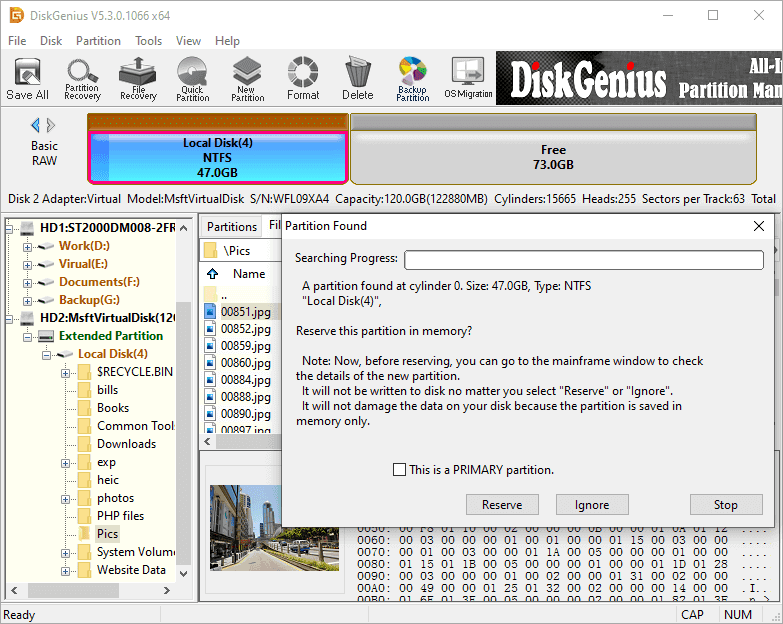
If you want to recover this partition, click the "Reserve" button to keep it; otherwise click "Ignore" to skip it. You can preview the files in the partition to easily decide whether it is one of the partitions to be recovered.
Step 3: Once the search is complete, click on the OK button.
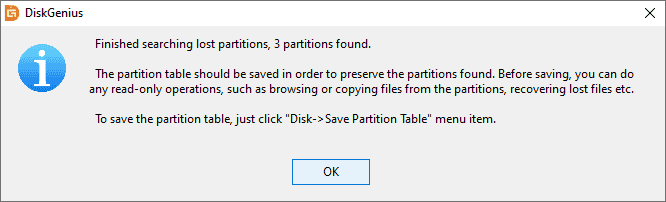
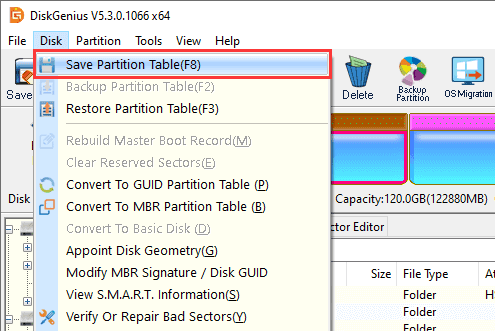
Since the scanning process is read-only, you will need to save the partitions to the partition table after they have been found and reserved in order to eventually recover them.
- During the recovery process, make sure that the destination disk has enough space to store the recovered files.
- Avoid writing new data on the hard disk where you lost the data to avoid overwriting the original lost files.
- If you cannot find the files you want in DiskGenius, you can contact our customer service staff via email: [email protected].
By following these steps, you can easily use DiskGenius for data recovery, and we hope this information is helpful to you! Remember to back up your important data regularly to prevent similar problems from happening again.
DiskGenius is a one-stop solution to recover lost data, manage partitions, and back up data in Windows.
Download Facebook
 YouTube
 X
X