
Updated on Dec. 28, 2023
Position: Resource - Partition Management - How to Partition a Hard Disk?
DiskGenius - The best disk partition software to partition a hard disk, wipe hard disk, clone HDD to SSD, convert dynamic disk to basic, export file directory tree to an HTML file, etc.
Now data processing is more and more frequent, so the capacity of the hard disk is also changing. Previously, the capacity was more than ten gigabytes, but now 2TB and larger hard disk has become the mainstream. The key is that the volume of the hard disk has also begun to enlarge, and the security performance has been continuously improved. Users will find that the transmission speed is several times faster than before. In addition to mechanical hard drive, SSDs are also widely used these days. Of course, hard disk partitioning is still a problem. Partitioning needs to be done manually. So how to partition hard disks or SSDs?
There are usually two types of hard disks. One is those that have been partitioned after purchase, and the other is those that have not been partitioned. If the hard disk is not partitioned, its drive letter will not appear in the computer when it is connected to computer. At this time, you can use Windows 10 Disk Management or third-party disk partition software to create new partitions on your hard disk.
Disk Management is a built-in tool in Windows 10, and many computer users have heard of it. It can help you manage hard disk partitions without restarting the system or shutting down the software. For Windows 10 users, this is really a handy tool to use. The steps to use this tool to partition the hard disk are as follows:
Step 1. Right-click the Start button in the lower left corner of the desktop and select Disk Management.
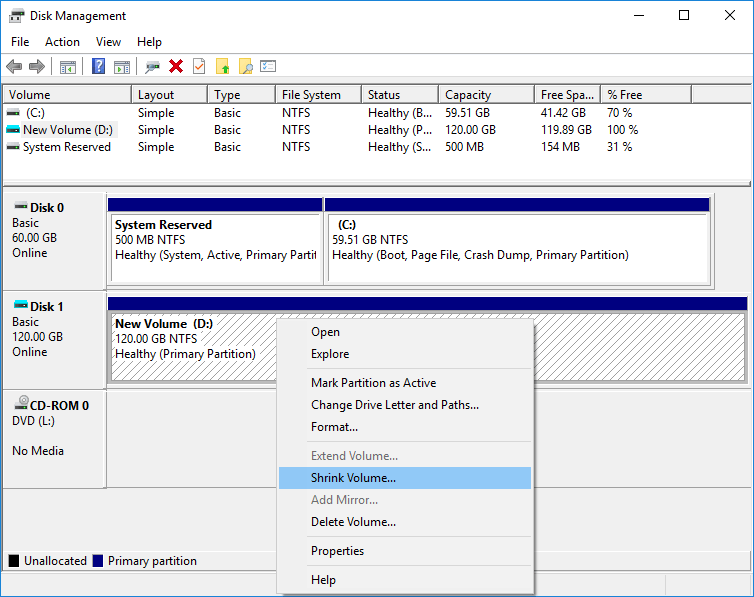
Step 2. Right-click the hard disk partition to be shrunk, and select Shrink Volume.
Step 3. Enter the amount of space (in MB) you want to shrink, and click the Shrink button.
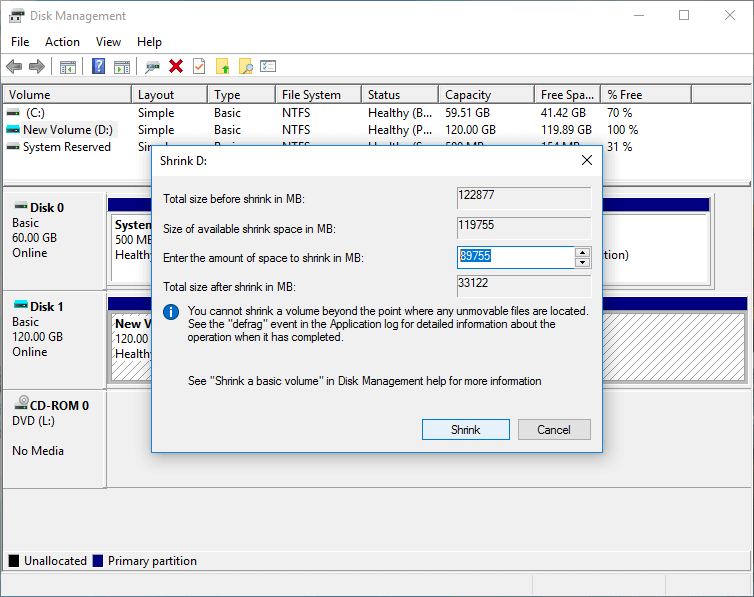
Wait for the process to finish and you will get an unallocated volume.
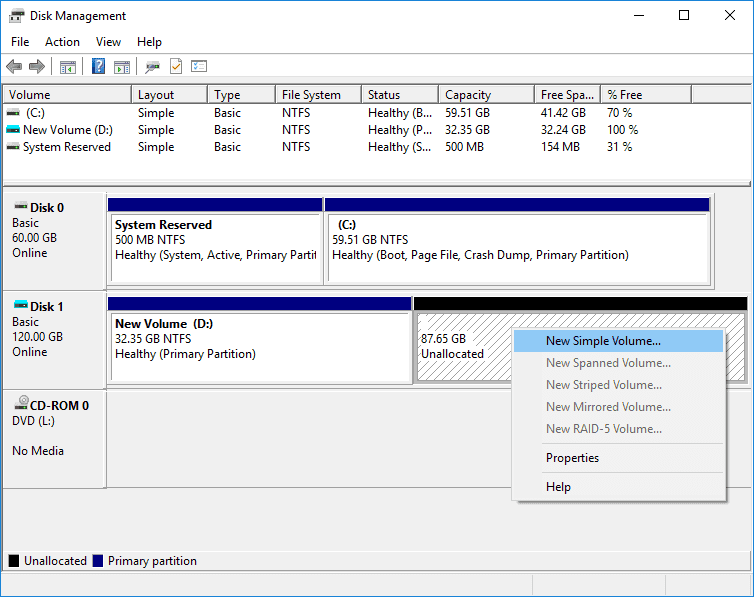
Step 4. Right-click on unallocated space on your hard drive and select New Simple Volume.
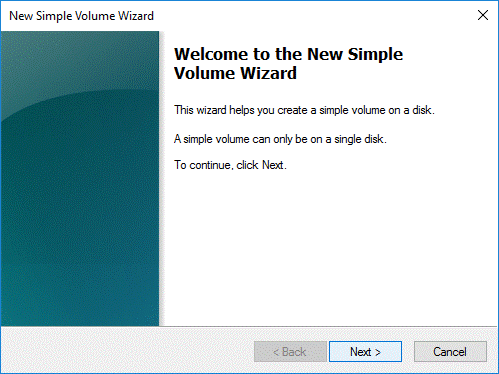
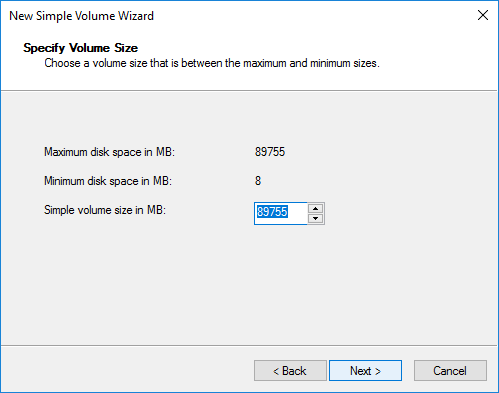
Step 5. On the New Simple Volume Wizard interface, click Next.
Enter the size of the volume you want to create in MB or accept the default size and select Next.
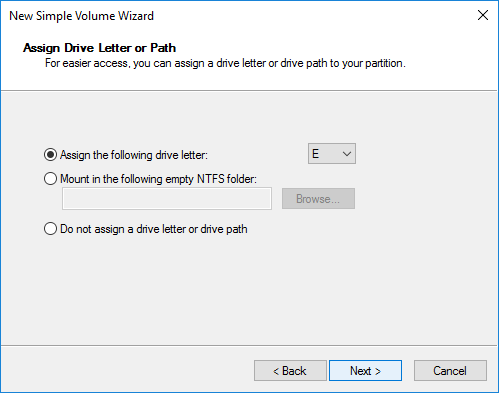
Step 6. Select the drive letter and click Next.
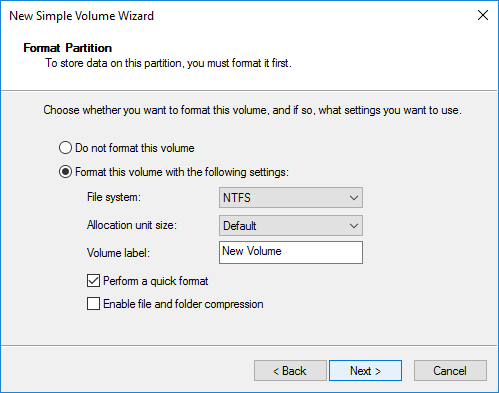
Step 7. Select the file system format, check the "Perform a quick format" option, and then click Next.
Step 8. Click the Finish button.
Compared with Disk Management that comes with Windows, the Quick Partition feature of DiskGenius Free Edition is more comprehensive and convenient. This function is used to quickly repartition hard drives. It is suitable for partitioning a new hard drive, or completely repartitioning a hard drive which has partitions. When executed, all existing partitions are deleted, the hard disk is then partitioned as specified settings, and all partitions are quickly formatted immediately after they are created. Users can specify the size, type, volume label, etc. of each partition. Partitioning and formatting can be done with just a few simple operations. If you do not change the default partition number, type, size and other settings, open the Quick Partition dialog box (shortcut key F6) and press "OK" to complete the repartitioning and formatting of the hard disk.
Step 1. Select the hard disk or SSD that needs to be partitioned, and then click the "Quick Partition", or press the "F6" key. The software displays the following dialog box:
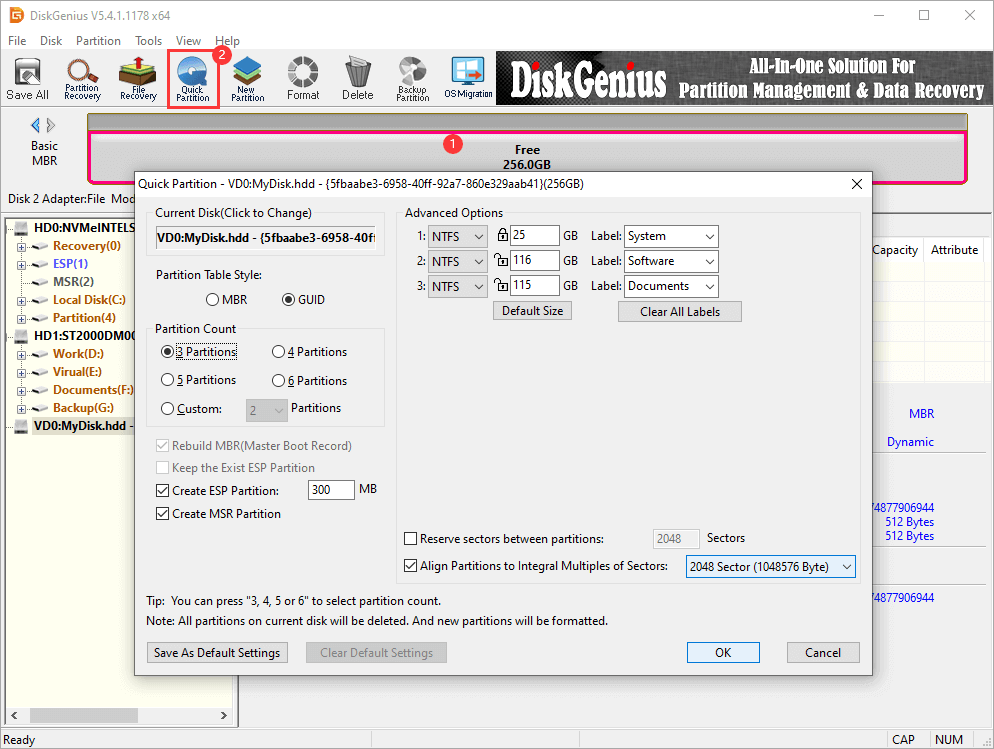
By default, this function will automatically take the currently selected disk as the target disk of the disk partitioning task. If the current disk is not the target disk to be operated, please click the disk name in the upper left corner of the dialog box, and the program will pop up a disk selection window.
Select the number of partitions: After opening the dialog box, directly press "3, 4, 5, 6" to quickly select the number of partitions. It can also be selected by clicking mouse. After selection, the right half of the dialog box immediately displays a list of the corresponding number of partitions. The default number of partitions is determined according to the size of the disk: 3 partitions for 60G and below, 4 partitions for greater than 60G and less than 150G, 5 partitions for greater than or equal to 150G and less than or equal to 320G, and 6 partitions for greater than 320G.
Adjust the partition parameters: The right half of the dialog box displays the basic parameters of each partition, including the partition type, size, volume label, and whether it is the primary partition. Users can adjust it according to their needs and preferences.
Partition file system type: The quick partition function only provides three types for selection: NTFS, FAT32 and exFAT.
Partition size: The default partition size is set according to the following rules: First, it is calculated according to the specified number of partitions. If the average partition size is less than 15G, the partition size is evenly allocated. Secondly, if the average capacity is greater than (or equal to) 15G, the size of the first partition is calculated as 1/20 of the total disk capacity, but not less than 25G. If it is less than 25G, it is fixed at 25G. Other partitions distribute the remaining capacity equally. This is considering that the first partition is generally used to install the system and software. If it is too small, it may not fit, and if it is too large, it is wasteful.
There is a "lock" icon in front of the capacity input edit box. When a user changes the capacity of a partition, the size of the partition is "locked". When changing the capacity of other partitions, the capacity of the partition will not be automatically adjusted by the program. The icon is displayed as "locked". Users can also freely change the locking status by clicking the icon; During initialization or after changing the number of partitions, the first partition is locked and other partitions are unlocked; When the user changes the capacity of a partition, other partitions that are not "locked" will automatically share the "remaining" capacity; If all partitions except the one being changed are locked, only the first and last partitions are resized. The final adjustment is determined by the order in which they were last changed. If the first partition is changed last, the tail partition will be automatically adjusted. Conversely, the first partition will be adjusted. The adjusted partition is automatically unlocked.
After clicking the "Default Size" button, the software will reset the partition size according to the default rules.
The partitions divided by this function, except those using "residual capacity", are all "integer partitions", that is, they are displayed as "integer" size in Windows Explorer, which looks more beautiful.
Volume label: The software sets the default volume label for each partition. Users can choose or change it by themselves, or clear the volume labels of all partitions by clicking the "Clear All Labels" button.
Whether the partition is primary (the GUID partition table has no concept of logical partition, and this setting is invalid for GPT disk when partitioning hard drive): you can choose whether the partition is primary or logical and set it by checking. It should be noted that an MBR disk can only have 4 primary partitions at most. If there are more than 4 partitions, the extra partitions should be set as logical partitions. The extended partition is also a primary partition. The software will automatically adjust the available status of this option according to the user's selection.
Align partition location (4K alignment): For some hard disks with large physical sectors and SSDs, their partitions should be aligned to an integer multiple of the number of physical sectors, otherwise the reading and writing efficiency will be reduced. In this case, you should check "Align Partitions to Integral Multiples of Sectors" and select the number of sectors to align.
Rebuild MBR (Master Boot Record): This is the default option, if there is an MBR-based boot management program on the disk, and you still need to keep it, please do not check this option.
Quick partition of GPT disk: This function is also applicable to create GUID partition table on GPT disk. In the left half of the Quick Partition dialog box, select GUID in the Partition Table Style section.
In addition, for GPT disks, you can also choose how to deal with ESP partitions and MSR partitions. In the presence of an ESP partition, it is possible to "Keep the Exist ESP Partition" and "Create ESP Partition".
After all settings are adjusted, you can click the "OK" button to perform partition and format operations. If there are old partitions on the disk, the software will prompt that all existing partitions and files will be removed.
After the hard drive is partitioned, the original partitions on the disk (if it exists) will be deleted automatically. The first newly created primary partition will be activated automatically.
Here is the video guide that shows how to partition or repartition a hard drive in Windows 10:
Both Disk Management and DiskGenius can solve the problem of how to partition a hard disk in Windows 11/10/8/7/Vista/XP. However, through the introduction of this article, you can find that using DiskGenius can more intuitively and flexibly partition a hard disk, external hard disk, flash drive or SD card. In addition to creating, deleting, and resizing partitions, DiskGenius has other advanced functions, such as clone disk, convert GPT to MBR, migrate Windows OS, etc. Apart from partition management, DiskGenius also supports data recovery and data backup. If you lose data due to certain reasons, you can use DiskGenius to restore your precious data at any time. Feel free to contact us with any questions.
Related Articles:
DiskGenius - A free disk partition manager to format hard drive, resize partition, convert MBR to GPT, create partition, access EXT4 drive, etc. in Windows 11/10/8/7.
DiskGenius is a one-stop solution to recover lost data, manage partitions, and back up data in Windows.
Download Facebook
 YouTube
 X
X