Position: Resource - Data Recovery - How to Recover Permanently Deleted Photos in Windows 10?
Table of Contents
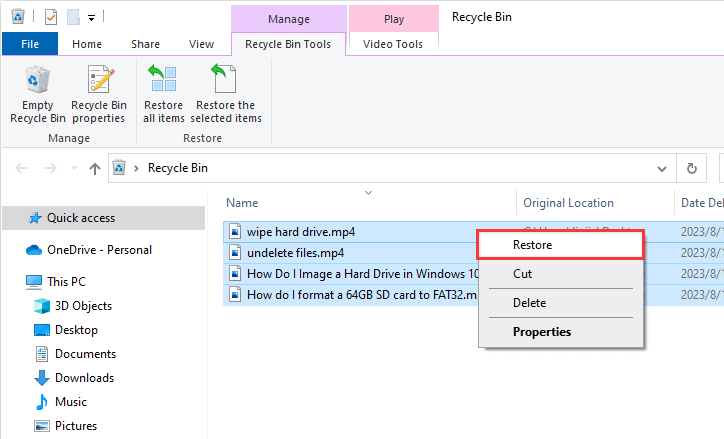
Deletion carried out in Windows 10 removed files from internal hard drive to the Recycle Bin, and you can restore deleted files before emptying the Recycle Bin. The method is as follows:
1. Right-click on its icon and select "Open" from the menu to open the Recycle Bin.
2. View the deleted files and choose what you want to restore.
3. Right-click on the selected files and select "Restore" to restore them to the original location.
You should back up your computer regularly to protect important data against damage or lost. In the event of data loss, such as photo loss, these backups can prove valuable. The Windows operating system comes with Backup and Restore tools. This is how you can retrieve deleted photos using them on a Windows 10 computer.
To restore deleted photos from Backup, you need:
1. Connect the storage device that contains the backup to your computer.
2. Right-click the Windows Start button, then right-click the Control Panel > System and Maintenance >Backup and Restore ".
3. Select "Restore My Files" or "Restore All Users' Files".
4. Search for missing photos by using Browse Files or Browse Folder option. You don't see individual photos when you browse through folders.
5. Select your photos and click Restore to restore them.
If photos you deleted are no longer in the Recycle Bin and you haven't backed them up, you can use photo recovery software. We selected DiskGenius data recovery software based on user reviews and functions provided by the tool. DiskGenius will scan your disk and retrieve these photos if they cannot be recovered by other means.
To restore permanently deleted photos on Windows 10, follow these simple steps:
Step 1: Download and run the software.
Open the official DiskGenius website and click the "Free Download " button on the homepage. Once downloaded, you can easily install and open DiskGenius.
Step 2: Select the partition that needs to restore deleted photos, and then click the "File Recovery" button, as shown in the picture below.
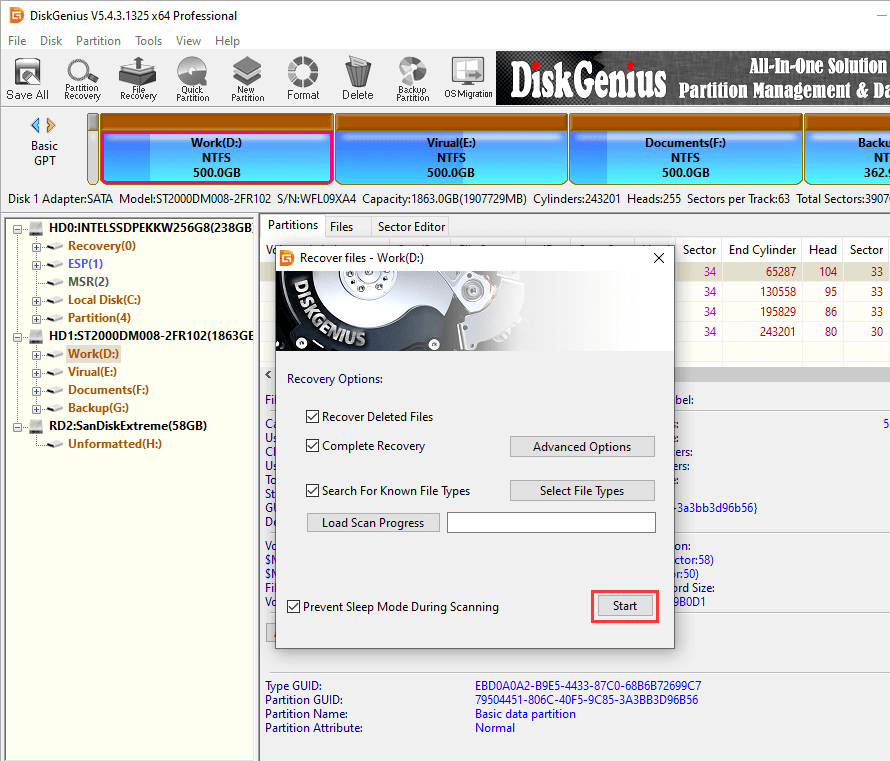
Click the "start" button on the pop-up window to allow the software to begin a full depth scan of the selected partition. During the scan, the software will list the photos found in real time, and the user can pause or stop the scan at any time.
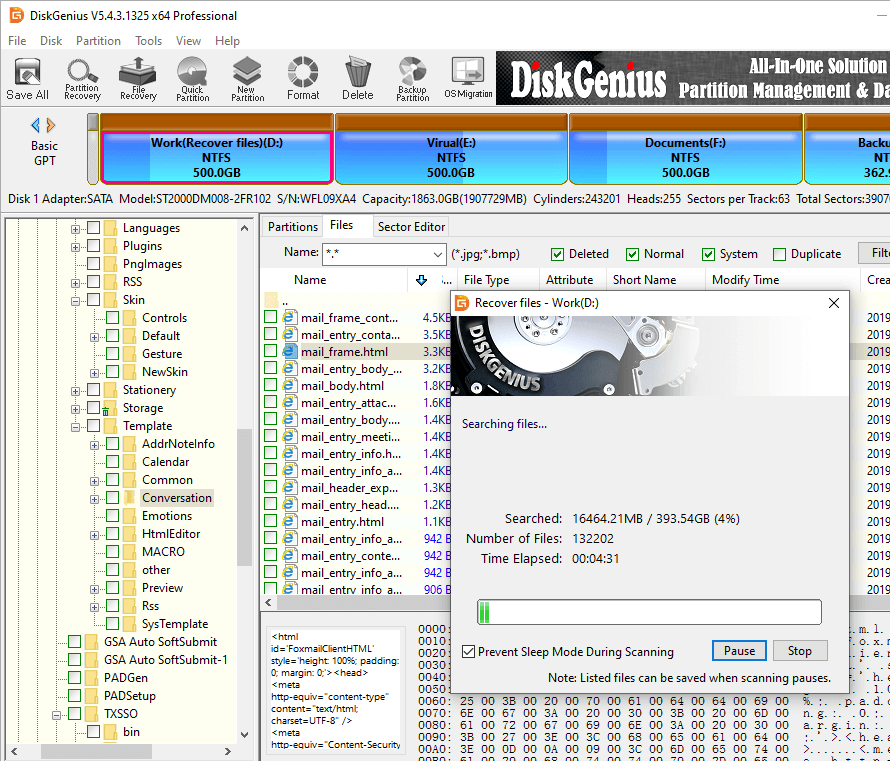
Step 3: Preview and restore photos.
During the scan and after the scan, photos can be previewed, so that you can quickly find the photos you want to restore, and judge whether the photos can be restored normally.
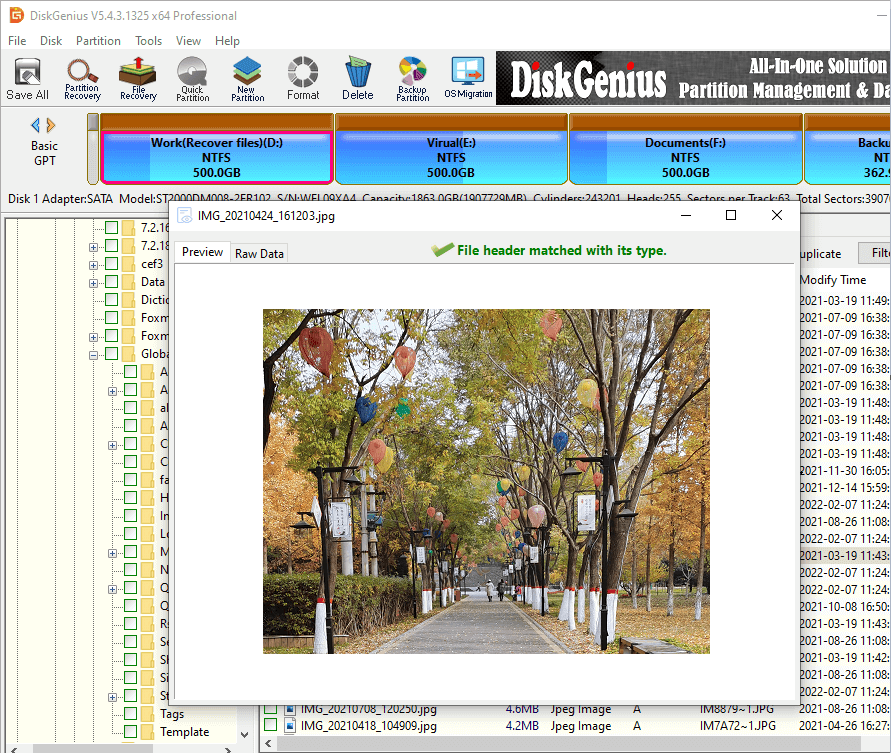
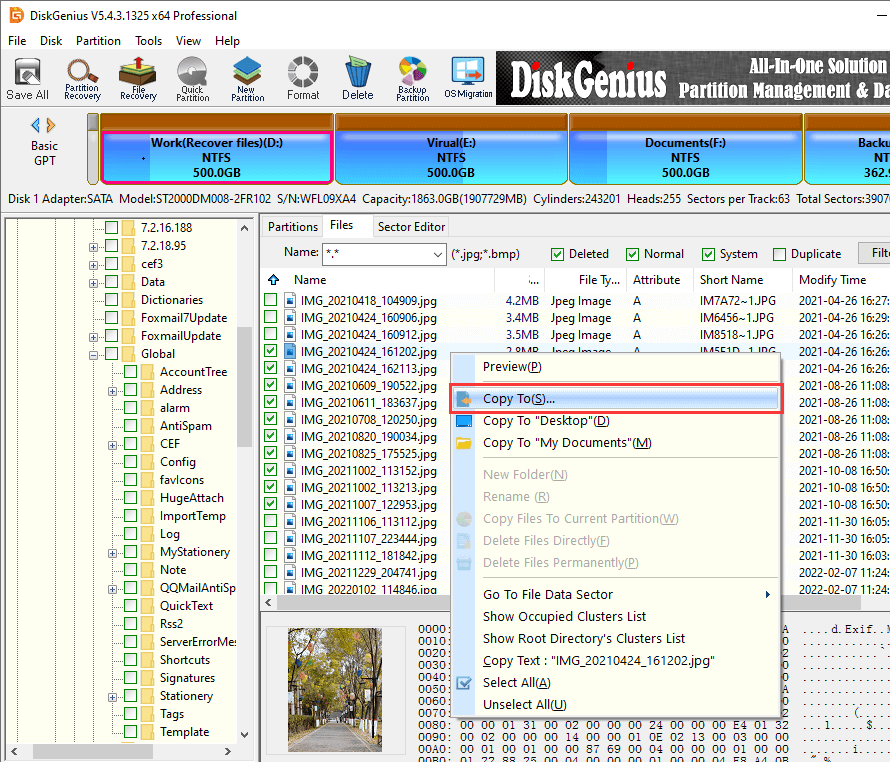
After checking the desired photos, right-click and select "Copy To"; Then you can select a location to save the photos.
After you find that photos are deleted, do not try any other operations in case of overwriting lost photos, just use this tutorial to get back lost data. In case your photos are lost again in the future, you can also double insure your photos security by using DiskGenius backup feature.
DiskGenius - Powerful data recovery software that can undelete files and photos from PC hard disk, SD card and USB flash drive in Windows 10.

DiskGenius is a one-stop solution to recover lost data, manage partitions, and back up data in Windows.
Download