
Position: How Tos - Partition Management - How to Fix Error Code 0x80070002 in Windows 11/10/8/7?
DiskGenius – An effective and yet simple tool to back up data, recover lost data, migrate Windows to SSDs, convert MBR to GPT, and more.
ô Free DownloadThe error code 0x80070002 is one of the common Windows errors users may encounter. Such numerical codes like 0x80070057, 0x80070005, and 0x80070002 are used by Windows to report specific issues, and their meanings are typically known only to Microsoft or tech professionals. These errors can occur in a variety of scenarios—most commonly related to system or application updates. Often, they appear with error messages that differ by Windows version. This article will walk you through several typical cases of the error and show you how to fix them step-by-step. For your convenience, each section includes a clickable subtitle for quick access.
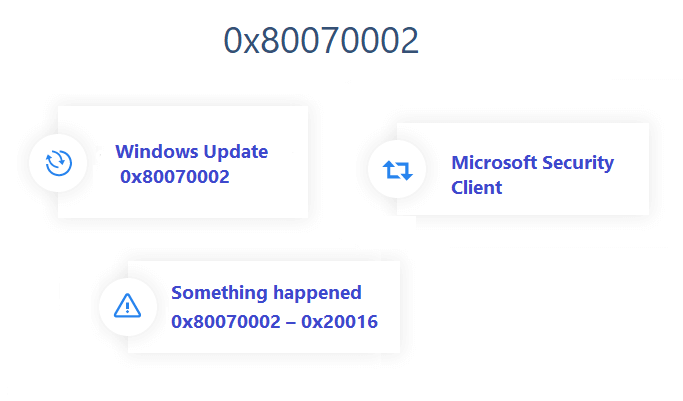
The 0x80070002 and 0x80070003 errors are common issues related to Windows Update. When working on your Windows PC and attempting to install system updates, you might encounter error code 0x80070002 or 0x80070003. These numeric errors are often accompanied by error messages that vary depending on the Windows version.
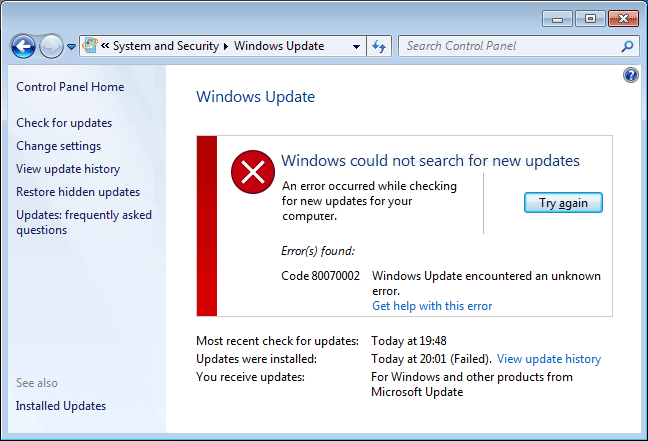
For example, if your computer is running Windows 8, 7, or Vista, you may receive the message:"Windows could not search for new updates. An error occurred while checking for new updates for your computer. Error(s) found: code 80070002. Windows Update encountered an unknown error."
For Windows 10 and Windows 11 users, the error message will be: There were some problem installing updates, but we'll try again later. If you keep seeing this and want to search the web or contact support for information, this may help: (0x80070002).

For Windows XP users, the message might be: "A problem is preventing Windows from accurately checking the license for this computer. Error code: 0x80070002."
Windows Update errors are usually caused by incorrect system time/date settings, file corruption, or registry issues. Fortunately, they are not difficult to fix. These errors occur when a system update fails, which leads to a data mismatch problem. Deleting the corrupted files can help resolve the issue. Here is a brief summary of the possible causes:
Now that causes of the error are not exclusive, solutions vary largely. This article provides a couple of solutions which have been tested effective in solving this error.
This solution sounds ridiculous but it does work for many users. If the time or date is incorrect, it'll have a bad effect on the Windows update service, and it's necessary to check the settings of date and time first when you get the error, which is quite easy.
Here's how to check and adjust the date and time settings on Windows 11/10/8/7:
For Windows 10:
Step 1. Right-click on the time displayed in the lower-right corner of the screen, then select "Adjust date/time".
Step 2. In the "Date & Time" settings window, ensure the "Set time automatically" option is enabled. If it's already turned on, try toggling it off and on again. Then click "Sync now" to manually sync your time with the internet.

Step 3. If the problem persists, go to "Additional settings" and click "Change time zone". Make sure the correct time zone is selected.
For Windows 11:
Step 1. Right-click on the time in the taskbar and select "Adjust date and time".
Step 2. In the "Date & Time" settings window, make sure "Set time automatically" is turned on. You can also click "Sync now" under the "Synchronize your clock" section to sync with the internet.
Step 3. If needed, manually adjust the date and time by toggling "Set time manually" and clicking "Change" to set the correct date and time.
After adjusting the settings, restart your computer and try installing the system updates again. If this doesn't resolve the issue, proceed to the next solution.
For Windows 7 and 8:
Step 1. Click "Date and Time" on the lower-right corner of the screen and click "Change date and time settings".
Step 2. You'll see the "Date and Time" window and click the "Change date and time" button.
Step 3. The previous step brings up the "Date and Time Settings" applet where you should set the correct date and time. Then click "OK" to save changes.
Now restart the computer and try to install system updates. If this method doesn't work, please move to the next solution.
If you get the 0x80070002 error because of a failed system update process, that means some files are corrupted. Hence, we should delete those files and try Windows update once again. You can follow these steps to settle the problem manually.
For Windows 10 and Windows 11:
Step 1. Stop the Windows Update service by pressing Windows + R, typing services.msc and pressing Enter.
Step 2. Scroll down to find "Windows Update",right-click it, and select "Stop".
Step 3. Navigate to the SoftwareDistribution folder: Open File Explorer, and go to C: > Windows > SoftwareDistribution.
Step 4. Delete all the contents of the Download and DataStore folders. Alternatively, you can rename the folder to "SoftwareDistribution.old" instead of deleting its contents.
Step 5. Restart the Windows Update service by going back to the "Services" window, right-clicking on "Windows Update," and selecting "Start".

For Windows 7:
Step 1. Stop Windows Update service.

Step 2. Delete corrupted update files in Software Distribution folder.
An alternative operation of step 2 is renaming the SoftwareDistribution folder as old if you don't want to delete files. Click Yes if you are prompted by a UAC (User Account Control) warning.
Step 3. Restart Windows Update service
Follow operations in Step 1 to locate the Windows Update service. Right-click it and click Start. Close the Service window and the Administrator Tools window.
Another common way to cope with the issue is using the Microsoft Fix It Tool, which can be downloaded online. This tool is able to automatically diagnose and fix common problems with Windows Update.
Step 1. Press Windows + I to open Settings, and click the Update & Security.
Step 2. Select Troubleshoot from the left-hand side of the window, and then click Additional troubleshooters.

Step 3. Click on Windows Update, then click Run the troubleshooter.

Step 4. The troubleshooter will automatically detect and attempt to fix issues related to Windows Update. Follow the prompts and apply any suggested fixes. Once completed, restart your computer and try to install updates again.
One less common reason of 0x80070002 is that the operating system is installed on a partition that is not activated. If you get into this situation, there are two options you can choose: one is to repartition the hard drive and reinstall Windows, which is not suggested, as repartitioning the hard drive removes everything; the second option is setting the system partition to active.
You can do this manually in Disk Management, but I'd like to recommend the use of DiskGenius Free Edition which is a powerful disk partition program packed with diverse features and makes it easy to manage partitions and disks as well as recover lost data.
Step 1. Install and run DiskGenius and you can see disk and partitions information displayed clearly on the main interface.
Step 2. Select the partition where Windows is installed, click the "Partition" menu, and select "Mark Partition as Active"
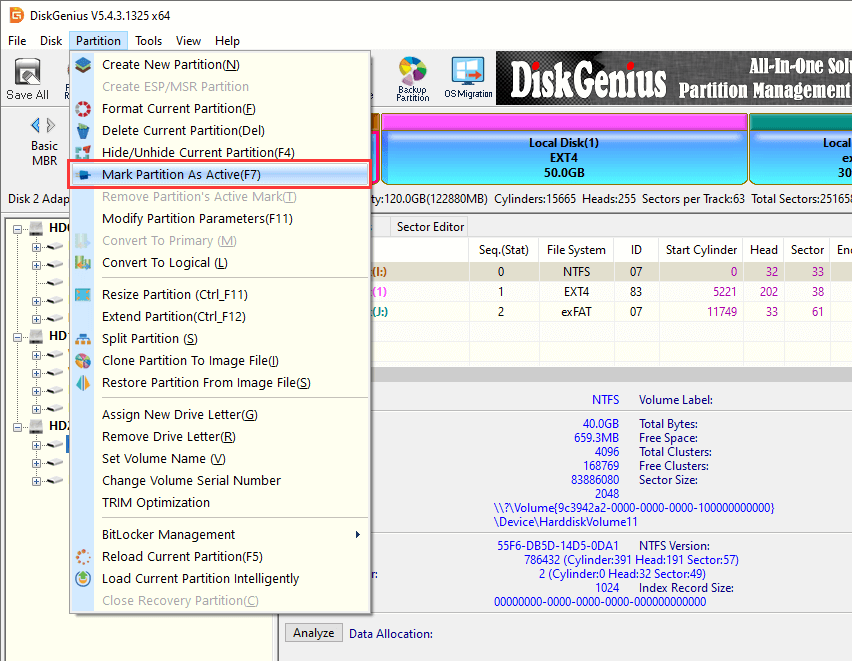
Step 3. Click "OK" button on the pop-up message box.
This method shows how to resolve the 0x80070002 error via scanning and repairing damaged or missing files with the system's built-in tools SFC and DISM.
Step 1. Run Command Prompt (CMD) as an administrator.
Press Win + S and enter cmd. Then right-click the Command Prompt and select Run as Administrator.
Step 2. Run the SFC (System File Checker) scan. In the Command Prompt, type the following command and press Enter.
sfc /scannow
The scan process will display the progress percentage and you need to wait for 10 to 30 minutes (depending on the system status).
The SFC scan may end up with following prompts :
Windows Resource Protection did not find any integrity conflicts
Windows Resource Protection found corrupted files and successfully repaired them
Windows Resource Protection could not repair some files
Step 3. Run DISM. Enter the following command and press Enter:
DISM /Online /Cleanup-Image /RestoreHealth
This process requires an Internet connection and may take 15 minutes to 1 hour. Do not close the window midway.
If the command ends up with the message "Operation completed successfully", the repair is successful, and you can restart the computer and re-run sfc /scannow to check again; If you get the error "DISM cannot connect to the Internet", check the network connection, or try to change the network environment (such as a mobile hotspot).
Notes:
Wait patiently: Do not force shutdown or interrupt the scan process, otherwise it may cause further damage to the system.
Combined use: It is recommended to run DISM to repair the system image first, and then run SFC to repair specific files.
System version consistency: When manually specifying the image source, the ISO image must completely match the current system version (such as Win10 21H2).
Hard disk errors can sometimes interfere with the normal operation of Windows Update, resulting in error 0x80070002. The following is a detailed introduction to the steps to use DiskGenius to detect and repair hard disk errors.
Step 1. Download and install DiskGenius.
Visit the DiskGenius official website, find the software download portal on the official website page, and click to download the latest version of the DiskGenius software installation package.
After the download is complete, find the installation package and double-click to run it. Follow the prompts of the installation wizard step by step. Once the installation is complete, you can find the DiskGenius shortcut icon on the desktop and double-click to open the software.
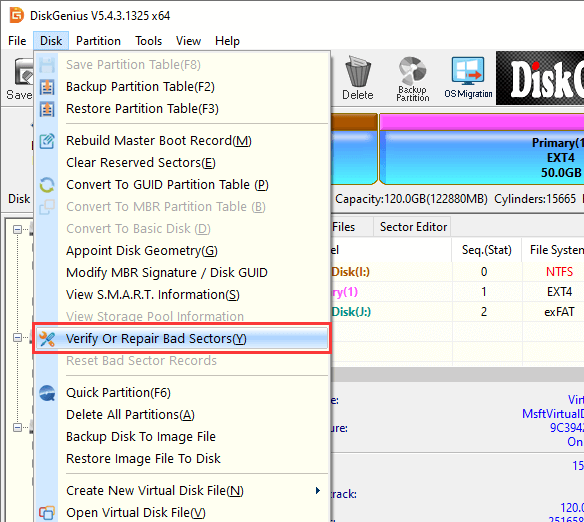
Step 2. Select the hard drive you want to test, click the "Disk" menu, and choose "Verify Or Repair Bad Sectors".
After entering the DiskGenius software main interface, you can see a list of all hard disk devices connected to the computer in the interface. Carefully select the hard disk that needs to be tested. Generally speaking, the system disk (usually the hard disk where the C drive is located) is the key test object, but if other hard disks also have abnormal conditions, they also need to be tested.
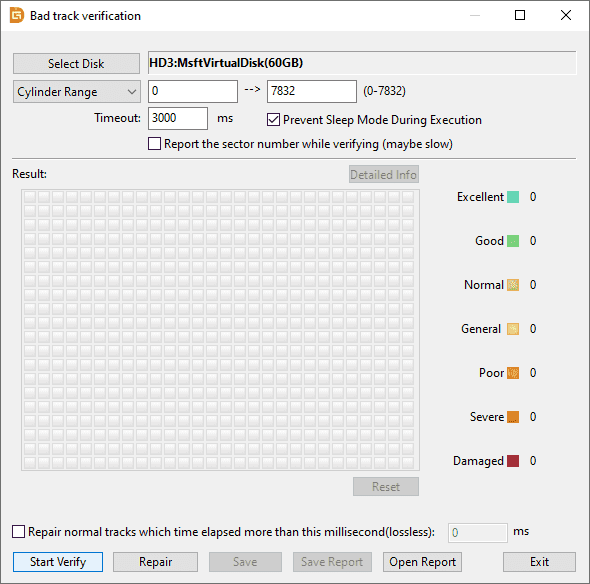
Step 3. Click the "Start Verify" button, and the software will start a comprehensive bad sector detection of the selected hard disk.
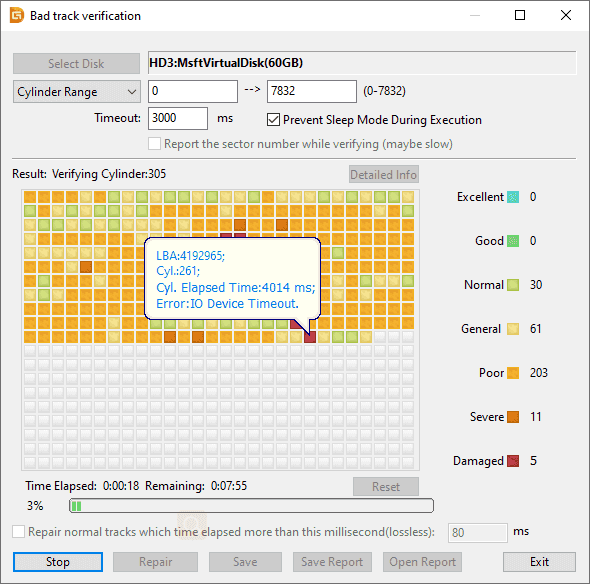
This process may take some time, depending on the size and health of the hard disk. During the detection process, if a bad sector is encountered, the software will display the bad sector situation in the dialog box. Generally, the red marked area represents a bad sector.
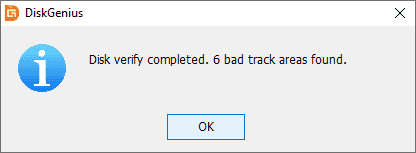
Step 4. After the test is completed, the software will report the number of bad sectors detected.
The error described in this article can be disabled to prevent it from being reported, even though it is not actually fixed. If you are fed up with the 0x80070002 or 0x80070003 and can't find out any provable issues on your PC, then you can follow the steps here to dismiss it.
Note: These steps only stop the error from appearing, which doesn't mean the error can be fixed by these operations.
Step 1. Log on your computer with the Administrator account. Open Registry Editor by clicking Start button ->All Programs ->Accessories ->Run. Type regedit and press Enter.
Step 2. Open the Registry Editor:
Windows 10 and 11: Click the Start button or the search bar -> Type regedit -> Select Registry Editor from the search results -> Click Yes in the UAC prompt.
Windows 7: Start button ->All Programs ->Accessories ->Run. Type regedit and press Enter.
Step 3. When the Registry Editor opens, you can navigate to the following path:
HKEY_LOCAL_MACHINE\SOFTWARE\Microsoft\Windows\CurrentVersion\Run\
Step 4. Then you will see the MSC key on the right pane of the Registry Editor. Right-click it and select Delete to remove the key.
Microsoft Media Creation Tool is provided by Microsoft and can be used to download and install Windows 10 upgrade for Windows 7 or 8.1 based PCs. If you do not want to wait for the Windows 10 upgrade through Windows update, you can use the Microsoft Media Creation Tool to download and install Windows 10. This method of upgrading the system to Windows 10 has been confirmed by Microsoft, which is why many users choose it for system upgrades.
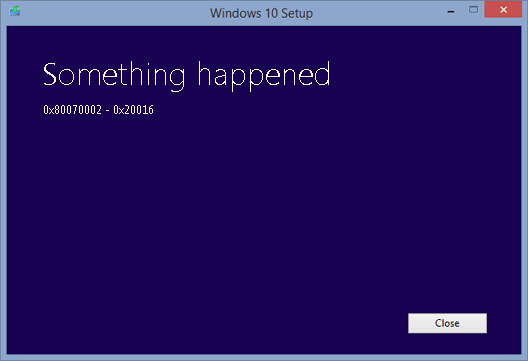
Have you tried downloading and installing Windows 10 with the Microsoft Media Creation Tool? Did it work well on your computer? Some people encounter problems during the process and receive an error message "Something Happened 0x80070002 – 0x20016". In some cases, the message appears without an error code.
Step 1. Open the Registry Editor: Press the Windows key and R on your keyboard to open the Run window. Type regadit and press Enter to load the Registry Editor. If you receive a prompt from UAC (User Account Control), please click Yes to proceed.
Step 2. Now you get the Registry Editor where you can navigate to the OSUpgrade key following the path:
HKEY_LOCAL_MACHINE\SOFTWARE\Microsoft\Windows\CurrentVersion\WindowsUpdate\OSUpgrade.
Step 3. In the right pane of the Registry Editor, select the OSUpgrade key and right-click it. Then click "New" and select "DWORD (32-bit) Value".
Step 4. Right-click the newly created entry (NewValue#1) and select "Modify". Please rename the entry as "AllowOSUpgrade", after which you can double-click it and enter "1", select "Hexadecimal", and click "OK".
You can now close the Registry Editor and retry Windows update, which can be launched from the Control Panel. Check for updates, and if any updates are available, click the "Get Started" button to download them.
Note:
You just installed Windows updates, which is quite normal for Windows users. However, after the update, you receive an error when Windows starts up. The error appears in a message box titled "Microsoft Security Client" with the following meesage:
An error has occurred in the program during initialization. If this problem continues, please contact your system administrator. Error code: 0x80070002".

If you are facing this error and are unsure of what to do, this step-by-step guide can help you troubleshoot the issue.
Step 1. Open the Service window: press the Windows key + R on your keyboard, type "services.msc" in the Run window's search box, and press Enter.
Step 2. Look for the Windows Update service, right-click it, and select Properties to view its settings
Step 3. When the Windows Update Properties (Local Computer) window pops up, go to the General tab. Select Automatic (Delayed start) for the Startup type. Click the Start button, then click Apply and OK to save the changes. Close the window. Back in the Services window, click File in the menu and select Exit.
Step 4. Open Windows Defender to download the update. Click the Start button, type "Windows Defender" in the search box, and hit Enter. Then, click the Update button under the Update tab.
Note:
If the problem persists after following the steps above, you can try using the Fixit tool to resolve the issue.
When your system or computer reports errors, it's important to take the issue seriously and attempt to resolve it, as these errors might be the very cause of potential data loss in the future. If you don't want to fix the errors or can't find an effective solution, it's a good idea to back up your important files. I recommend using DiskGenius Free Edition, as it provides diverse ways to back up data and offers effective data recovery features.
DiskGenius can back up an entire partition or hard drive into an image file, clone partitions, copy hard drives, clone hard drives with bad sectors, migrate Windows OS to SSDs, back up partition tables, and more. Each backup feature is available with different algorithms to suit various needs. Here's how you can back up the system partition into an image file:
Step 1. Install and launch DiskGenius. Find the partition to be backed up within the program.
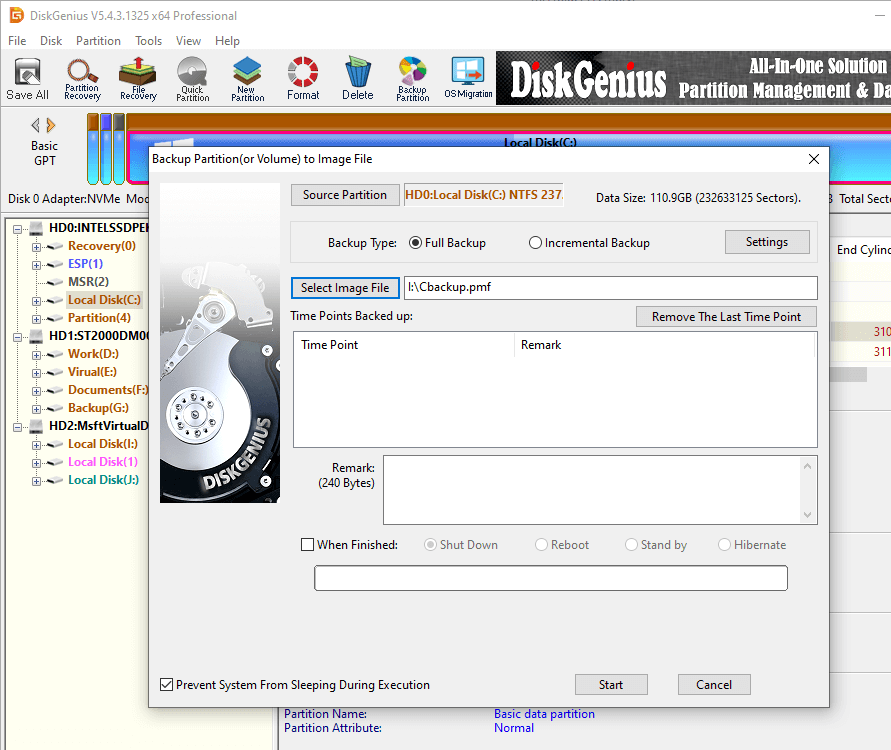
Step 2. Select the system partition (usually drive C) and click "Backup Partition" button. Next the backup window will pop up.
Step 3. Set a location to save the backup file, name the file, and click the "Start" button.
If the partition hasn't been backed up before, the default backup type will be a full backup. Afterward, you can perform incremental backups as needed.
DiskGenis – Create reliable PC backups, recover lost data, resize partitions without losing data, test HDD/SSD health, check and repair bad sectors, etc.
ô Free Download DiskGenius
 DiskGenius Free
 DiskGenius Standard
 DiskGenius Professional
 Edition Comparison


 Facebook
 YouTube
 Twitter