Position: How Tos - Partition Management - Fix 0x800705b4 in Windows Update, Autopilot, SCCM, and Defender
DiskGenius – Offers complete backup features to help you image disks, clone hard drives, migrate Windows OS to an SSD/HDD, etc.
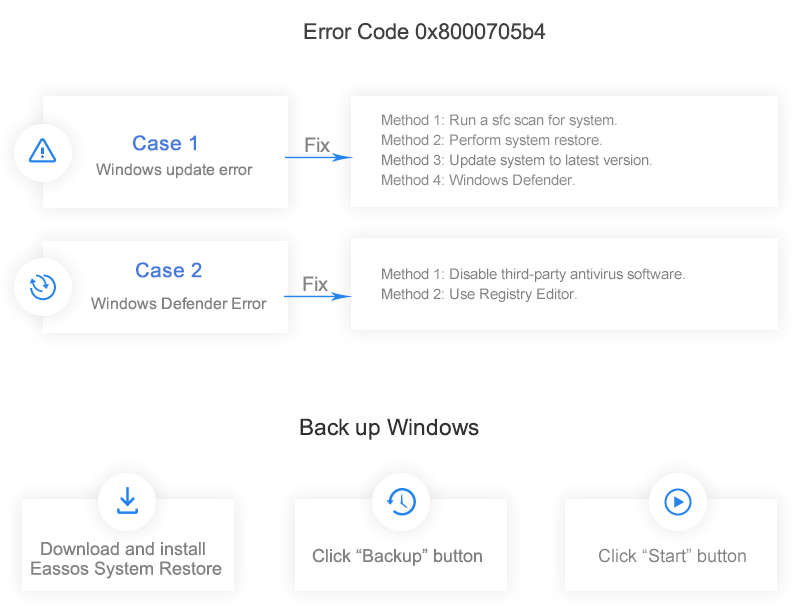
ô Free DownloadError 0x800705b4 that happens to Windows computers can be fairly common and the same code may appear in different circumstances with different error messages. 0x800705b4 is hexadecimal data format and it's a common way used by Microsoft Windows to display errors. Computer users shouldn't ignore such errors even though it seems like no big deal. But the final outcome can be the slowdown or crashing of computer or even data loss if it is not fixed. This article gives step-by-step guides to solve this frequently happened error in Windows Update, Windows Defender, Windows Autopilot, and Windows SCCM.
The following subtitles are quick links to the detailed content:
The Windows Update (WU) is a service provided by Microsoft, and its task is offering updates for operating system and Microsoft products such as Microsoft Office, Windows Live Essentials, etc. Usually, the operating system is configured to download and install Windows Updates automatically if the computer is connected to the Internet and there are available updates. Microsoft also allows its clients to install updates on their computers without connecting to the Internet, as well as other alternative solutions and programs to install updates. Windows updates include several kinds of updates, such as security updates and critical updates that fix system vulnerabilities against malware or security exploits. Other updates address bugs or enhance system functionality.
Occasionally, Windows Update may fail to work normally and be unable to install updates. Nowadays, the Windows update error 0x800705b4 is no longer a strange problem to many Windows users. This error code often appears together with an error message, for example: "There were some problem installing updates, but we'll try again later. If you keep seeing this and want to search the web or contact support for information, this may help: (0x800705b4)".

A lot of times, users ignore the error and continue to use their computers, which is not advisable. This Windows Update 0x800705b4 error might become a disaster for your computer. You are more likely to encounter more computer trouble if the error can't be resolved with an effective solution. For the purpose of information security and computer performance, you should put an end to the issue as soon as you can. Next, we'll gives several methods, please read on.
Generally, if you have no clue what to do to get rid of the Windows update error, it's a smart choice to run the SFC for your system. It's a free tool, and it is able to fix many common system errors. The sfc scannow command enables users to find out corrupted Windows system files and repair them. As we all know, once system files are damaged or lost, the computer won't be able to perform as well as before.
Step 1. Start the Command Prompt. Click the "Start" button and type "cmd" in the search box and you can see its icon. Right-click it and choose "Run as administrator".
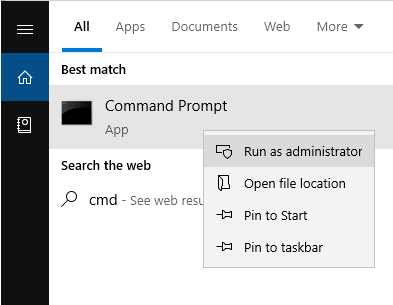
If you are asked to provide administrator password or confirmation from UAC, enter password and click Allow.
Step 2. Now you can see the Command Prompt where you can type or copy the command "sfc /scannow" and press the Enter key.
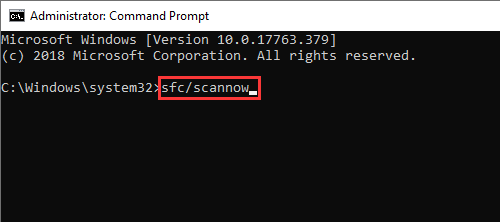
The process of scanning all protected system files and fixing corrupted files begins; do not close Command Prompt before the process is done. If Windows Resource Protection didn't find any integrity violations, you'll get one of the following messages:
Performing a system restore is really an efficient and wise choice to fix any problems on the current system status. System backup is usually completed when Windows was in the groove and free from errors. Note: back up important files in system partition before restoring the system. Besides, if your system has never been backed up, skip this method.
The Windows operating system can be backed up by professional programs as well as the backup feature offered by Windows. A majority of users prefer the former option, as third-party system backup software such as IsooBackup (formerly known as Eassos System Restore) makes the task easier and more flexible. IsooBackup offers a 15-day free trial and you can download and follow its backup wizard to back up your operating system. The ending part introduces how to back up Windows with IsooBackup. The following part shows how to do a system restore with the Window built-in utility.
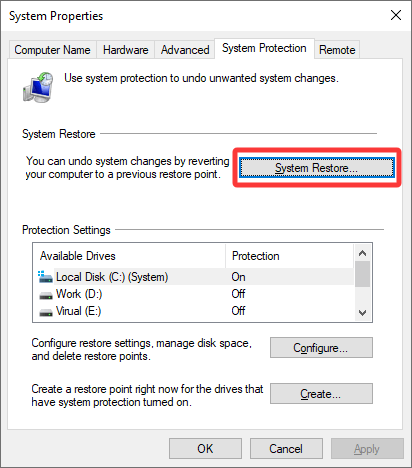
Step 1. Click the search box next to the "Start" button and type "system restore" in the search box. Click the "Create a restore point" in the list of results.
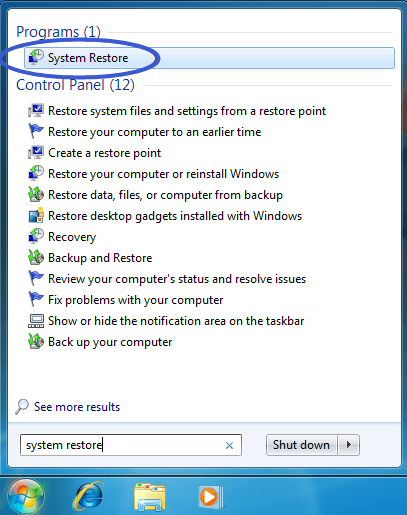
Step 2. In the System Properties window, click on the "System Restore" button.
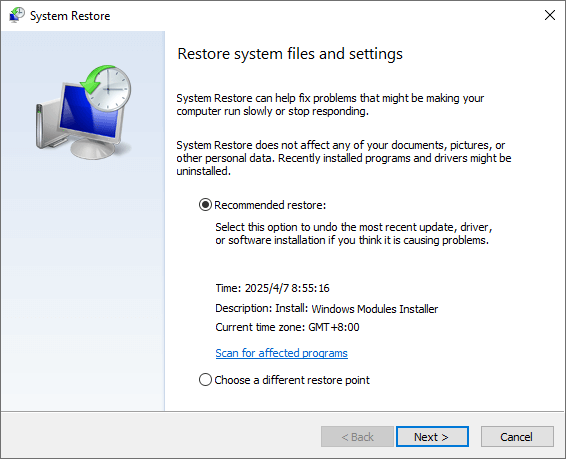
Step 3. Choose a restore point and click Next.
You can choose the "Recommended restore" or "Choose a different restore point" based on your situation.
System restore needs to restart your computer to apply changes. Before you proceed, save any open files and close all programs. The process may take several minutes. Don't interrupt it.
Though the computer has been set to install updates automatically, sometimes it still fails to do so because of some reasons, for example, a bad network connection. In that case, the reinstallation of updates manually can solve the 0x800705b4 problem.
Step 1. Click the "Start" button and click Settings (the gear icon). Select "Update & Security" and then click Windows Update.
Step 2. Click "Check for updates" on the left part of the pane and update Windows to latest system.
If you are using Windows 10 and facing the system update error code 0x800705b4, please try following steps.
Step 1. Update Windows Defender from the security center. To locate Windows Defender, click Start button -> Settings ->Update & security -> Windows Defender.
Step 2. Go to Windows Updates and click "Advanced options". Click the option to get updates for other Microsoft products.
Step 3. Restart the computer and check for updates again. The update process will be done without problems. When you receive the message "Your device is up to date", click "Advanced options" again and recheck update options for Microsoft programs.
Step 4. Check updates once more time, and now you should be able to get them downloaded and installed. Then update other programs.
If you continue to see this error after trying methods above, your problem might be caused by other factors. It's normal that solution to this error may vary from user to user, so I list other solutions found online and hope they can work for you.
Windows system offers users one built-in protection tool – Windows Defender, which is designed to provide real-time protection for your computer. It is one of the useful tools provided by Microsoft and most of the times it works effective as described. It's freeware that protects the Windows operating system from external threats such as spyware and malware, and it is a good alternative to additional third-party software to protect your computer.
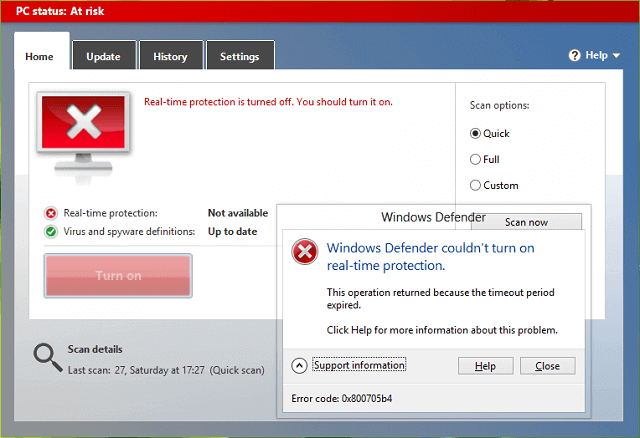
However, no software is completely free from bugs or errors. There are many cases that Windows Defender fails to start or scan the system and gives different error messages. These messages often appear with numeric code such as 0x80070002 and 0x800705b4. 0x800705b4 is one of the most frequently happened errors, and it can cause Windows Defender to stop and show an error message: "Windows Defender couldn't turn on real-time protection. This operation returned because the timeout period expired. Click Help for more information about the problem. Error code: 0x800705b4".
- Your computer has installed some third-party protection software which is not compatible with Windows Defender. The conflict between these two tools leads to the error.
- The registry is missing or corrupted, system drivers are outdated, or Windows is not updated. There are cases that your computer reports 0x800705b4 because of certain Windows settings are lost.
- Windows is infected by the latest virus or malicious software, making the system unable to use the tool.
The error stops Windows Defender from working properly and facilitates viruses to penetrate the system. Hence, it should be fixed to assure the system remains in a secure environment. A number of solutions can be used to get rid of the error, as the causes vary from user to user. This part gives two most commonly recommended solutions.
Step 1. Disable or uninstall third-party antivirus software temporarily. You can go to the software's official website to look for detailed instructions.
Step 2. Keep Firewall turned on. If you have both third-party antivirus software and firewall installed on your computer, you should make sure the Windows firewall is enabled.
Click the search box next to the Start button and type firewall. Click "Firewall & network protection" from the search result. Next, on the right part of the window, make sure Firewall is on.
Step 3. Start Windows Defender. Click the search box next to the Start button and type Service. Right-click Services from the search results and choose Run as administrator. In the Services window, locate Windows Defender and set its startup type to Start.
Step 4. Restart the computer to make these settings take effect.
Step 1. Open the Registry Editor.
Press Windows key + R key, enter regedit, and press Enter. If you are prompted by UAC to give confirmation, click Yes to confirm.
Step 2. Navigate to the following path:
HKEY_LOCAL_MACHINE\SOFTWARE\Policies\Microsoft\Windows Defender
Step 3. You'll see a file named DisableAntiSpyware on the right part of the window. Double click REG_DWORD, and you can see the Value data is 1 on the pop-up box. Replace 1 with 0 and click OK.
Alternatively, you can delete the key: HKEY_LOCAL_MACHINE\SOFTWARE\Policies\Microsoft\Windows Defender
Step 4. Restart your computer, and Windows Defender should return to normal working status.
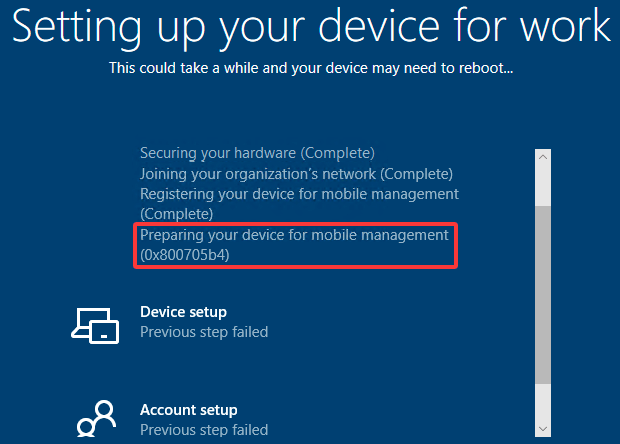
When enterprise IT administrators use Windows Autopilot to deploy new devices, the "Preparing your device for mobile management (0x800705b4)" error usually pops up in the following stages:
During the OOBE (out-of-box experience), when the device tries to connect to Azure AD for registration, the progress bar will stagnate and eventually an error prompt window will pop up.
The device is stuck in the "Preparing device" interface for a long time (usually more than 30 minutes), and finally displays the error code 0x800705b4, which may also be accompanied by an auxiliary prompt of "Unable to connect to organizational resources". If you check the event viewer, you will see "DeviceEnrollment" related records.
This error usually causes the device to fail to complete the automatic configuration or the enterprise policy and application cannot be deployed normally, and manual intervention is required to continue the setup process.
According to Microsoft official documents and statistical analysis of hundreds of enterprise deployment cases, this error mainly comes from the following aspects:
Network connection problems (65% of cases): The outbound interception rules of the enterprise firewall are too strict, blocking the necessary Azure AD connection; the proxy server is improperly configured, and the special proxy rules required for Autopilot are not correctly configured; the internal DNS server cannot correctly resolve key domain names; port 443 is accidentally closed or restricted
System time is not synchronized (20% of cases): CMOS battery failure causes BIOS time reset and serious system time deviation; NTP server is unreachable, causing the device to be unable to synchronize with the time server; wrong time zone setting, especially international version devices purchased by multinational companies.
Configuration policy problems (10% of cases): Autopilot configuration file errors, for example, there are conflicting settings in the deployment policy; the registration timeout setting is too short, and the default value cannot adapt to the high-latency network environment; the device hash is not pre-registered, and the new device is not correctly imported into the Autopilot device list.
Other system problems (5% of cases): Windows image is damaged, especially custom deployment images; network drivers of specific hardware manufacturers have problems; local system key services are not running properly.
Windows Autopilot greatly simplifies the deployment process of new devices, but many IT administrators will feel troubled when encountering the "Preparing your device for mobile management (0x800705b4)" error. Below I will introduce several proven solutions in detail to help you solve this problem completely.
Step 1. Perform basic network tests. Connect the device to a mobile hotspot or other unrestricted network, then open the command prompt (administrator) and execute the following commands in sequence. This will help check whether they can be pinged normally and whether the delay is within a reasonable range.
ping login.microsoftonline.com
ping enterpriseenrollment.manage.microsoft.com
ping enterpriseenrollment-s.manage.microsoft.com
Step 2. Test the port connectivity.
Use telnet to test port 443: telnet login.microsoftonline.com 443
If there is no telnet client, you can test it through PowerShell: Test-NetConnection -ComputerName login.microsoftonline.com -Port 443
Step 3. Check whether the proxy server is normal. First, open "Settings" - "Network and Internet" - "Proxy"; then, temporarily turn off the "Use a proxy server" option; try Autopilot registration again.
Step 4. Adjust firewall rules. Open Windows Defender Firewall with Advanced Security and create a new outbound rule to allow connections from the following endpoints. Restart the device after applying the rule.
*.manage.microsoft.com
*.microsoftonline.com
Step 1. Perform basic time synchronization. Open the command prompt as an administrator, and then execute the following commands to force time synchronization:
net stop w32time
w32tm /unregister
w32tm /register
net start w32time
w32tm /resync
Step 2. Check the NTP server configuration.
Step 3. Verify the time zone. Open "Settings" - "Time and Language" - "Date and Time", and make sure "Set time automatically" and "Set time zone automatically" are both turned on. In addition, you need to manually check whether the time zone matches the actual location.
Step 1. Back up the current registry. Open the Registry Editor (regedit) and navigate to the path below. Right-click "Export" to back up the current branch.
HKEY_LOCAL_MACHINE\SOFTWARE\Microsoft\Windows\CurrentVersion
Step 2. Create timeout settings. Create a new item "CDJ" under CurrentVersion (if it does not exist), and then create a new DWORD (32-bit) value in the CDJ item and name it "AADJTimeoutInMinutes". Double-click the newly created value and change the value data to 60 (decimal); finally, restart the device for the change to take effect.
Step 1. Prepare the installation media. Download the latest Windows image from Microsoft's official website, make a bootable USB drive, and select the GPT partition scheme.
Step 2. Install the system completely. Boot from the USB drive, press Shift+F10 on the installation interface to open the command prompt, and enter the following command to skip the network connection. Connect to the network after completing the basic installation.
OOBE\BYPASSNRO
Step 3. Re-register Autopilot. After entering the system, connect to the enterprise network, open "Settings" - "Accounts" - "Work or school account", and then select "Sign in only on this device" to start the registration process.
Step 1. Collect necessary logs: open the Event Viewer and export the these logs:
Application and Service Logs/Microsoft/Windows/DeviceManagement-Enterprise-Diagnostics-Provider
Windows Logs/System
Step 2. Look for Autopilot specific logs by navigating to the path: %windir%\debug\microsoft\windows\provisioning\autopilot, and then copy all *.log files.
Step 3. Log in to the Microsoft 365 Administrator Center, create a new service request, and upload all collected logs. Provide a detailed description of the error and the solutions you have tried.
When you encounter the error "This operation returned because the timeout period expired. Error code: -2147023436 (0x800705b4)" while using System Center Configuration Manager (SCCM), it means that an operation was forced to terminate because the preset waiting time exceeded. This error may occur in a variety of SCCM operation scenarios, including but not limited to key management tasks such as software deployment, policy updates, client installation, and inventory collection. The 0x800705b4 error usually exhibits the following typical symptoms:
Client communication failure: The SCCM client cannot establish an effective connection with the management point (MP) or distribution point (DP), especially in large enterprise environments.
Software deployment interruption: The application or update package suddenly stops during the deployment process, and a timeout error is recorded in the log.
Policy retrieval problem: The client cannot obtain the latest management policy in time, resulting in inconsistent configuration.
Inventory collection delay: Hardware or software inventory data cannot be uploaded to the site server on time.
Specific manifestations in the error log: "Failed to get DP locations" and other similar entries appear in the client log (such as LocationServices.log); the CCMExec service may report an operation timeout; client request processing delays are recorded in the management point log.
After analyzing a large number of enterprise cases, we found that the main causes of the 0x800705b4 error include:
Network-related issues (45% of cases): high network latency, such as the network latency between the client and the SCCM server exceeding the operating threshold; bandwidth restrictions or traffic shaping policies on key network links; intermediate firewalls interrupting long-term connections; DNS resolution delays, slow response of name resolution services.
Server performance issues (30% of cases): SCCM server load is too high, CPU or memory resources are insufficient; disk I/O bottlenecks, slow response of database or distribution point storage; SQL Server performance issues, query execution timeout.
Configuration issues (20% of cases): timeout settings are too short, the default timeout value is not suitable for the actual environment; site boundary configuration errors, clients are assigned to inappropriate sites; client settings are not ideal, and parameters such as polling intervals are improperly configured.
Other issues (5% of cases): insufficient client resources, low performance of terminal devices; security software interference, real-time scanning affects communication; WMI is damaged, and there are problems with Windows Management Specifications.
Step 1. Perform basic network tests:
First, perform a continuous ping test from the client to the SCCM server for at least 5 minutes to check the average latency and packet loss rate: ping <SCCM server FQDN> -t
Then, test the connectivity of key ports:
Test-NetConnection <SCCM server IP> -Port 80
Test-NetConnection <SCCM server IP> -Port 443
Step 2. Analyze the network path, and you can try two methods:
Perform tracert to determine the network path: tracert <SCCM server FQDN>
Use PathPing to analyze path performance: pathping <SCCM server FQDN>
Step 3. Optimize bandwidth and QoS. Ensure that SCCM traffic has sufficient bandwidth; configure QoS priority for SCCM-related traffic on network devices; consider deploying distribution points (DPs) at remote sites to reduce WAN dependence.
Step 1. SCCM server resource monitoring, you can use Performance Monitor to track key indicators, such as CPU usage, memory availability, disk queue length, and network utilization.
Step 2. Optimize SQL Server.
First, check the maximum memory configuration of SQL Server:
EXEC sp_configure 'show advanced options', 1;
RECONFIGURE;
EXEC sp_configure 'max server memory (MB)';
Then, optimize the SCCM database index:
USE CM_<site code>
EXEC sp_updatestats;
Step 3. Adjust IIS configuration, including increasing the idle timeout of SCCM-related application pools (for example, adjusting the default 20 minutes to 40-60 minutes); optimize application pool recycling settings.
Step 1. Adjust the client timeout settings in the client registry. Find CCM in the following path: HKEY_LOCAL_MACHINE\SOFTWARE\Microsoft\CCM, and then add or modify:
"CcmHttpTimeout"=dword:0000003c (60 seconds)
"CcmHttpsTimeout"=dword:0000003c
Step 2. To modify the client location service timeout, find the path: HKEY_LOCAL_MACHINE\SOFTWARE\Microsoft\CCM\LocationServices, and then set: "LocationServiceTimeout"=dword:0000003c
Step 3. Modify the client policy through the SCCM console, for example, increase the number of policy request retries (the default 3 times can be increased to 5 times), and extend the policy retrieval timeout.
Step 1. Adjust the site system role. First, check the management point load balancing configuration; then, consider adding additional management points for large sites; and optimize the distribution point content distribution strategy.
Step 2. Optimize boundaries and boundary groups. Make sure that all IP ranges are correctly included in the boundary definition; also check the boundary group and site allocation relationship; and verify the client automatic site allocation logic.
Step 3. Adjust component configuration, for example, modify the number of SMS_EXECUTIVE component threads, adjust the distribution manager (DistMgr) concurrency settings, and optimize software distribution component parameters.
For many computer users, nothing is worse than the system getting damaged and needing to be reinstalled. During that process, you may have to spend a lot of time reinstalling the system and hardware drivers, downloading and reinstalling frequently used programs, reconfiguring system settings, and recovering personal files. If you want to avoid this, you should maintain a system backup.
It has always been recommended to create a system image of your computer in case of problems or crashes. The image file should include all data in the system partition, such as Windows, system settings, installed programs, and files. The system image should be stored in a location separate from the system partition so it won't be affected if the system fails. With a system backup image, you can restore your system when it slows down or stops functioning properly. How to back up Windows 10?
IsooBackup (formerly known as Eassos System Restore), easy-to-use system backup software, is designed to complete system backup with just a few mouse clicks. This program has an intuitive wizard for the backup and restore process, which can be used by both expert users and beginner users.
Step 1. Free download and install the trial version of IsooBackup on your computer.
Step 2. Launch the backup software and click the Backup button from the main interface.
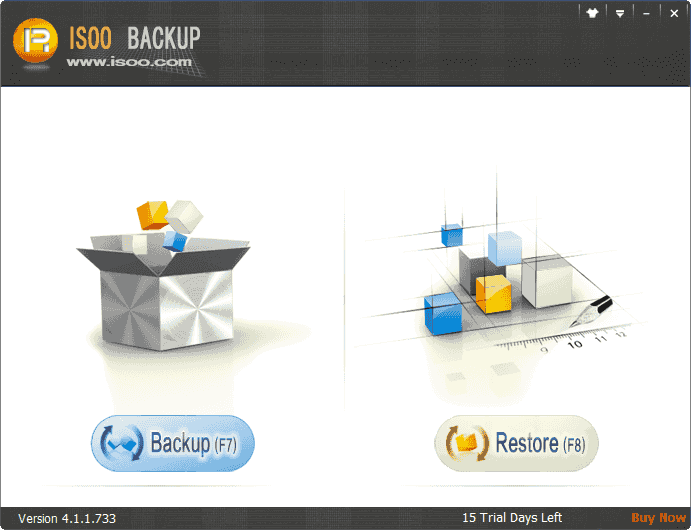
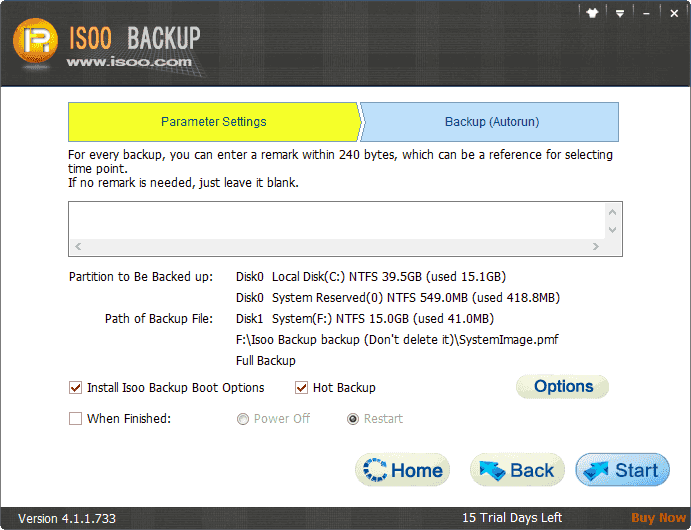
Step 3. Click the "Next" button to start backing up system.
Before that you can click "Options" to configure advanced settings, such as where to store the system image, how to compress the image files, set a password, etc.
If you're unsure what to choose, you can follow the default settings.
DiskGenius provides all-in-one solutions to data recovery, disk partition management, data backup, and disk utilities. You can simply use it to back up Windows system, non-system partitions, hard drives, files and folders, partition tables, and more. It is also an efficient disk cloning program that can migrate Windows OS, or clone an entire disk or partition.
Here is how to back up the system partition using DiskGenius Free Edition.
Step 1. Install and launch DiskGenius Free Edition from your computer.
Step 2. Select the system partition (e.g., the C drive) and click the "Backup Partition" button from toolbar, or click "Partition" and select "Clone Partition To Image File", as below. This opens the partition backup window.
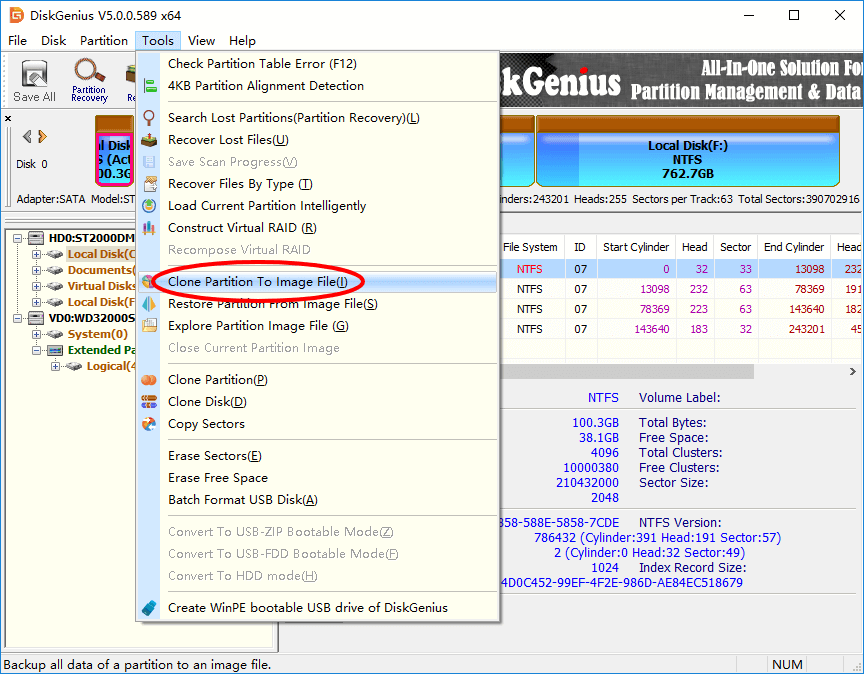
Step 3. Click the Select Image File button to choose a location to save the backup image and name the image file.

Step 4. Click the Start button and confirm the operations to be performed. DiskGenius will then back up the partition to an image file. Wait for the process to complete.
DiskGenius – Smoothly manage disk partitions, back up data, and recover lost files to keep your PC running at its best.
ô Free Download Facebook
 YouTube
 X
X