The Clone Disk feature copies all partitions and data, including files and file system structures, from a source disk to one or more target disks. During the cloning process, DiskGenius creates partitions on the target disk that match the size and type of those on the source disk, then clones the content of each partition one by one.
There are three disk cloning modes available:
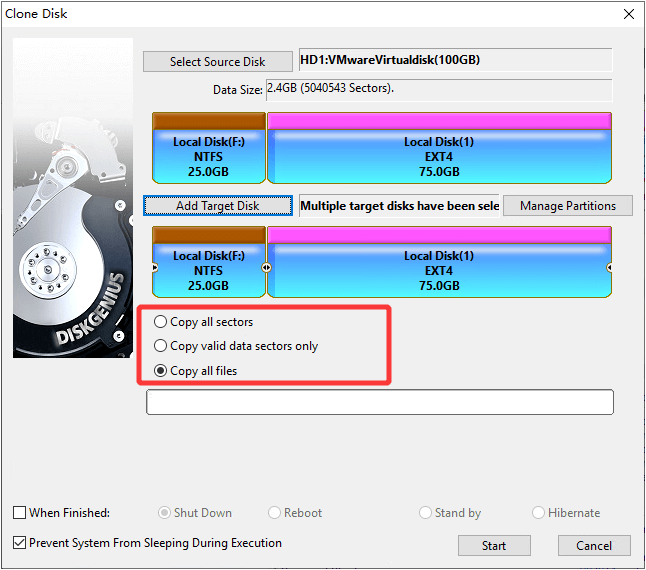
Copy all sectors: Copy all sectors from the source disk to the target disk without considering whether the sectors contain valid data. It performs a sector-by-sector clone without filtering, resulting in a large data volume and slower speed. However, it is the most complete copy method which ensures an exact replica of the source disk.
Copy valid data sectors only (Copy all valid sectors according to the layout of the file system): The data from each source partition is copied as-is to the corresponding partition on the target disk, based on the original data structure. After the disk cloning process, the data structure on the target partitions will be identical to that of the source. Invalid sectors are excluded during the process. Since only valid sectors are copied, this is the fastest method of the three.
Copy all files: This method analyzes the file system of each partition and copies all files to the corresponding partition on the target disk. During the process, files are reorganized based on the requirements of the file system, eliminating fragmentation and providing good performance.
Notes:
1. The Copy all sectors and Copy valid data sectors only methods require the target disk to be equal to or larger than the source disk. The Copy all files method only requires the target disk to be at least as large as the used space on the source disk.
2. For file systems that are not supported by DiskGenius, the cloning process will automatically use the Copy all sectors method to ensure the cloned partition is consistent with the original.
3. All data and partitions on the target disk will be erased. Please back up important data in advance.
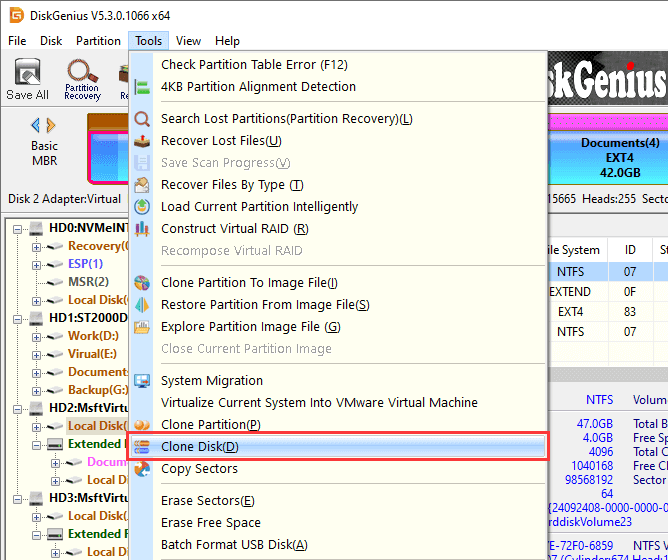
Step 1. Click "Tools" menu and choose "Clone Disk" option.
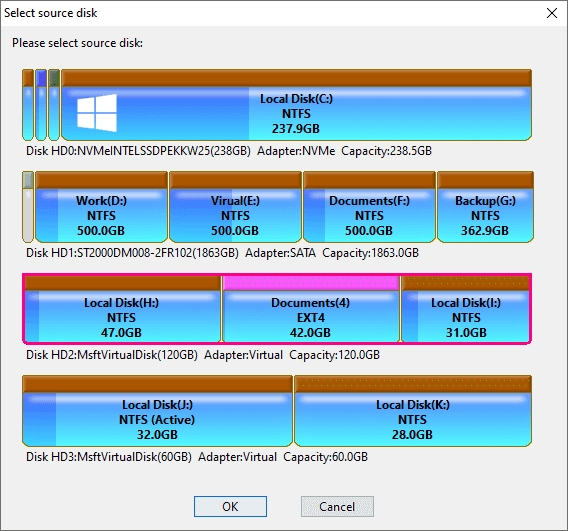
Step 2. In the "Select source disk" dialog box, choose the disk you want to clone and click "OK".
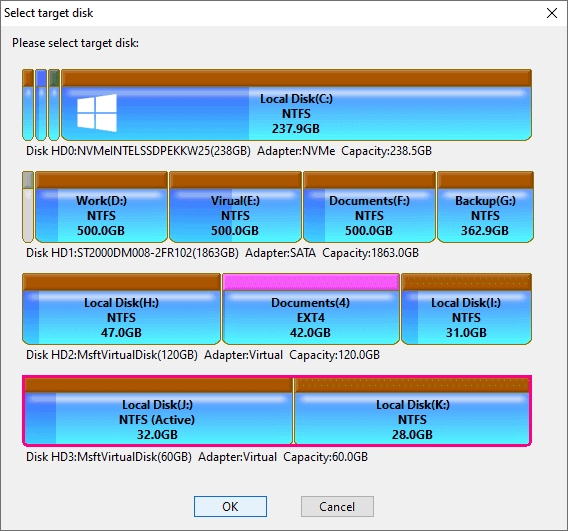
Step 3. Select the target disk(s).
In the "Select target disk" dialog box, choose a target disk and click "OK".
Warning: All partitions and data on the target disk will be deleted. Please back up important data beforehand.
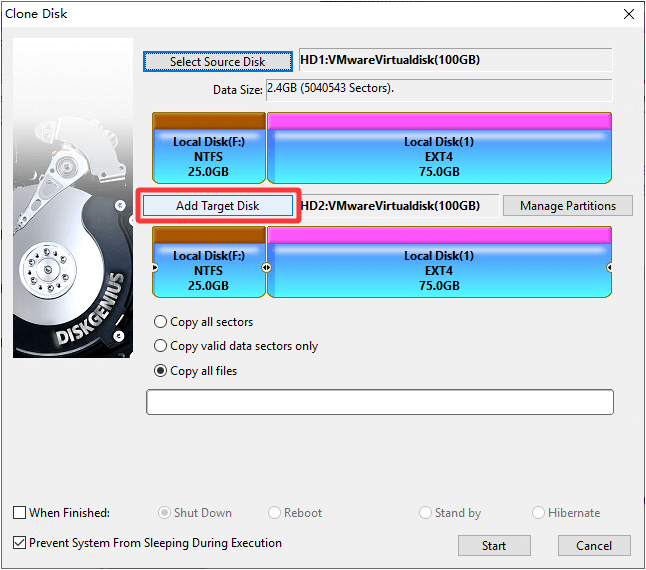
To clone the source disk to multiple target disks at the same time, click the "Add Target Disk" button to add more target disks.
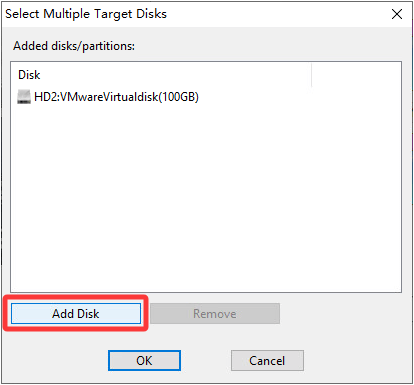
In the "Select Multiple Target Disks" window, click "Add Disk".
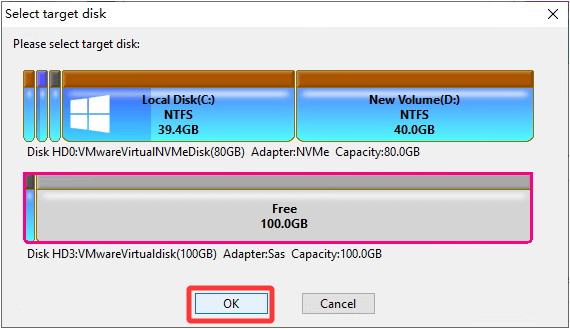
Select the disk you want to add and click "OK".
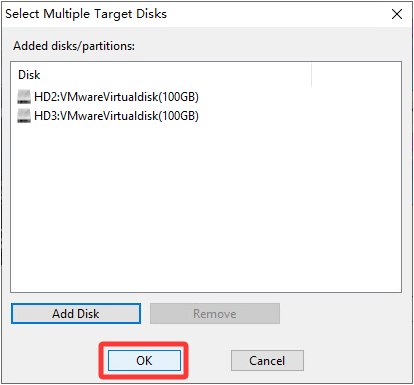
After adding all the target disks, click "OK" to proceed.
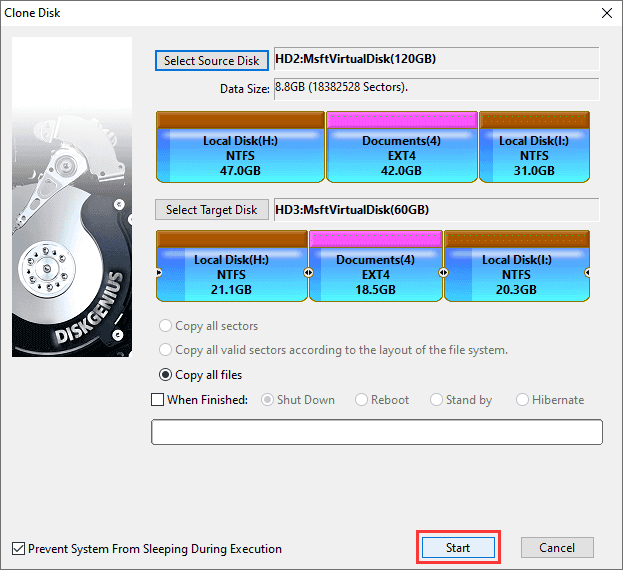
Step 4. Select a cloning method based on your needs.
Tip: If the target disk is smaller than the source disk, only the "Copy all files" method will be available.
If you choose the Copy all files method, you can also:
1) Manually adjust partition size on the target disk by dragging the partition borders.
2) Click the "Manage Partitions" button to add or remove partitions to be cloned.
Step 5. After setting the target disks and cloning method, click "Start" to proceed.
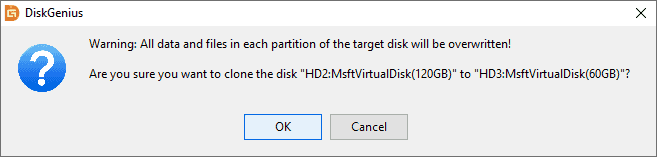
A warning dialog will appear, informing you that all partitions and files on the target disk will be overwritten. Please ensure that there is no important data on the target disk, or that data has been properly backed up. Click "OK" to confirm.
Step 6. Choose how to execute the disk cloning process.
DiskGenius offers two execution modes:
Hot Migration: No system reboot is required. The operation is performed by taking snapshots while the system is running. Please save all work before proceeding.
Lock & Execute: The source partitions will be temporarily locked during the cloning process to prevent other programs from accessing them. Make sure to close any programs that may be using the source disk to avoid data loss.

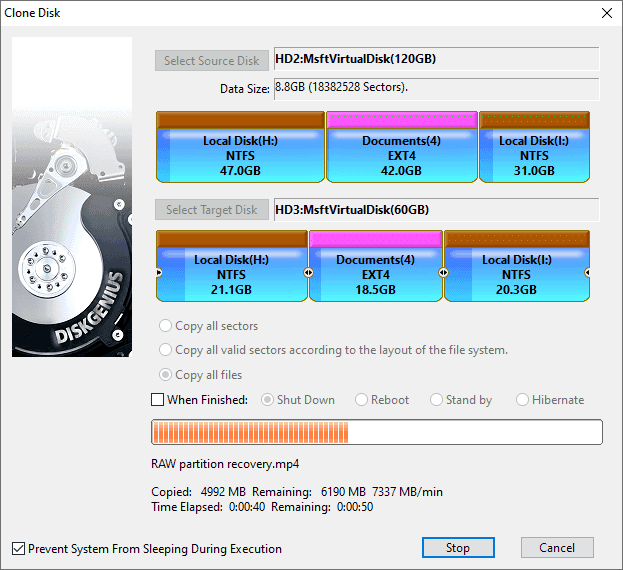
Step 7. Wait for the cloning to complete.
Once the cloning begins, DiskGenius will show detailed progress, including overall progress, data copied and remaining, elapsed time, and estimated time left.
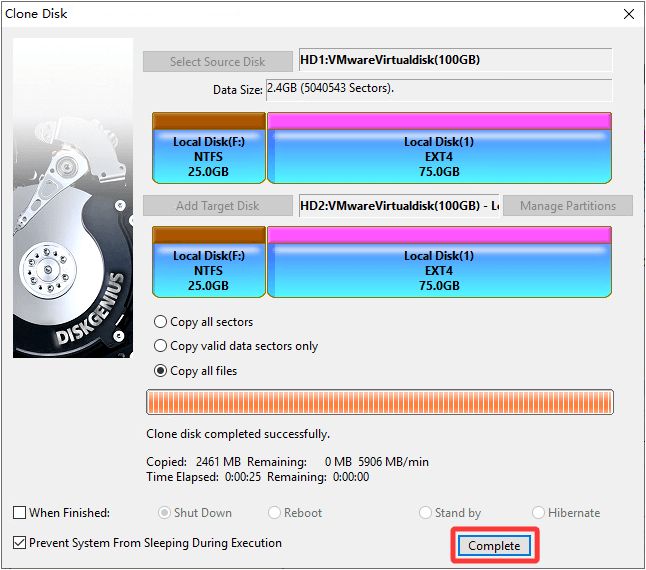
After the cloning is complete, click "Finish".

 Facebook
 YouTube
 X
X