DiskGenius provides a bad sector verification feature as well as limited bad sector repairing capability. To ensure the accuracy of the test result, it is recommended to run bad sector verification in a WinPE environment. During the test, avoid performing any read/write operations on the target disk.
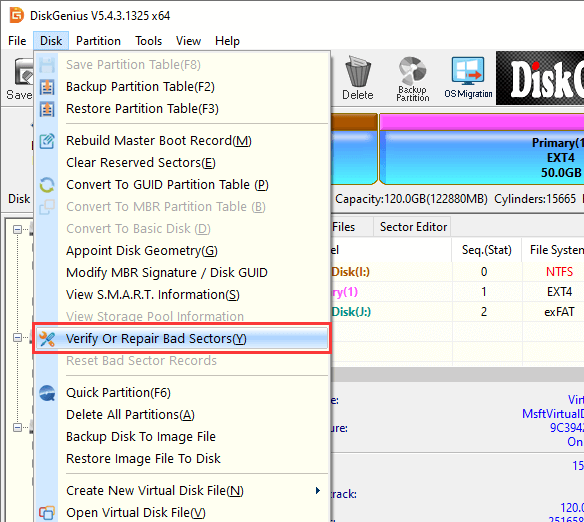
Step 1. Select the disk you want to check bad sectors and click "Disk" - "Verify Or Repair Bad Sectors/Blocks". You also can right-click the disk and choose the option form the context menu.
Step 2. Start checking bad sectors/blocks.
Click the "Verify" button and DiskGenius will immediately begin scanning the selected disk for bad sectors.
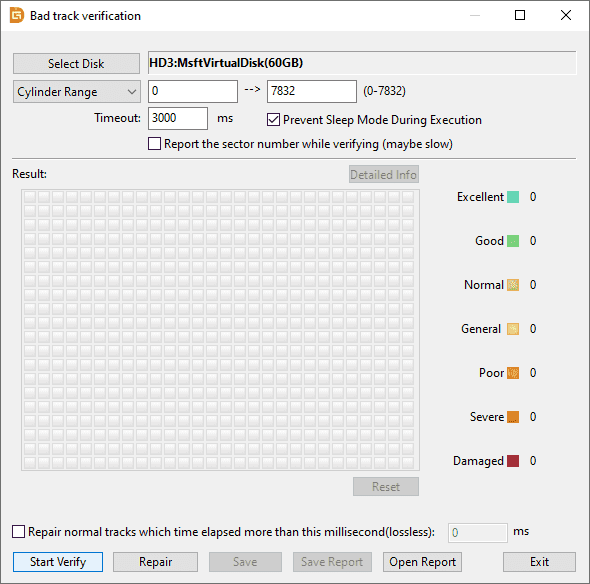
You can set cylinder range and timeout value before verifying bad sectors. If you are not familiar with these settings, then follow default settings.
Tip: DiskGenius supports verifying multiple disks at the same time. If you want to include additional disks in the same verification task, follow these steps before clicking "Verify":
(1) Click the "Add Disks" button. In the "Select Multiple Target Disks" window, click "Add Disk".

(2) Choose the disk you want to include and click "OK".

(3) After all disks are added, click "OK" to return to the main dialog.

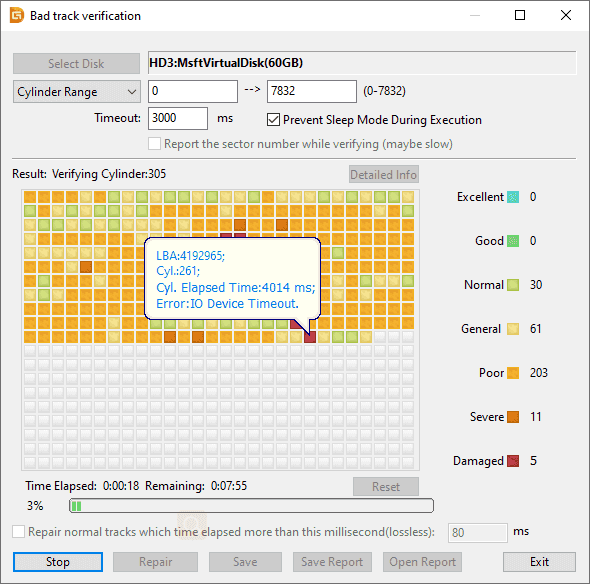
Step 3. When bad sectors are detected, DiskGenius displays the result using colored blocks: Red blocks marked "Damaged" represent bad sectors.
The scanning speed may slow down when the program encounters bad sectors.
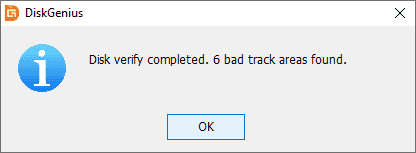
Step 4. After the scan completes, DiskGenius will report the number of bad sectors found.
When verification finishes, you can click Save Report to export the result as an Excel file or text file. You can also click Save Progress to save the current scan results. You can later resume or view this by clicking Load Progress.
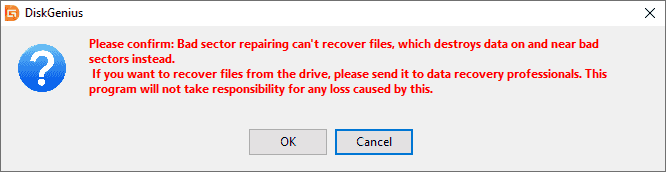
Step 1. If you want to repair the bad sectors detected in the previous scan, click Repair and DiskGenius will display a warning message.
Although checking bad sector is read-only, repairing bad sector destroys data stored on or near the damaged area. This may lead to partition table corruption, partition loss, or file/data damage. Please backup or recover data before trying to repair bad sectors.
Step 2. Click "OK" button if you've backed up all data on the disk.

Step 3. Click "OK" button if there is no need to recover data from the disk. Then DiskGenius starts to repairing bad sectors.
Bad sector repair is not a method for recovering data. If the damaged area contains critical data, do not attempt software repair. Instead, send the drive to a professional data recovery service. Moreover, not all bad sectors can be repaired, this feature only works for certain types of bad sectors.
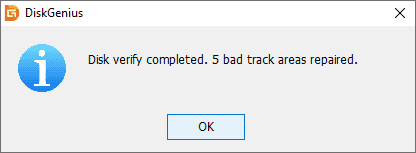
Step 4. Once finished, the software will report the number of repaired bad sectors.
For data safety, it is strongly recommended not to use a disk that has developed bad sectors, even if they have been repaired. Do not store important files on such disks.


 Facebook
 YouTube
 X
X